Uploading assets
Creating new tour
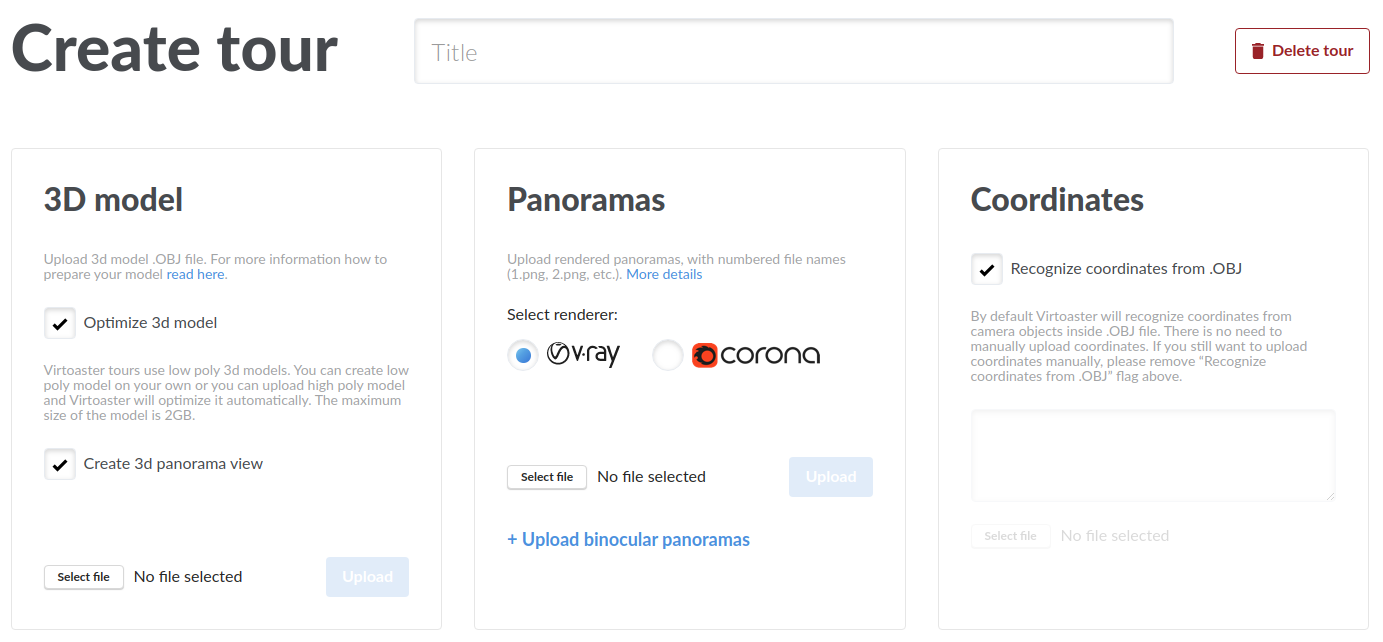
To start creating a tour, press “Create tour” on the top of Virtoaster web page or enter existing folder and scroll down to the bottom of the tour list. You will enter asset uploading interface.
Any Virtoaster tour require three key assets. First, there are 360 panoramic renders. So far we only support the following images:
- Cubemap 6x1 (12x1 for binocular renders) format
- 9216x1536 px. resolution (18432x1536 for binocular renders)
- .jpg or .png image format (we recommend to upload only .png images to avoid double compression when using .jpg)
- image file names should contain a sequential number in order to match renders with points in a tour (numbering should not have any breaks and file name should contain distinct number e.g. “Render_01.png”, “Render_02.png”, etc., names like “10001.png” can not be used.)
Uploading panoramas
If you followed our instructions for setting up camera and managing your render settings carefully, you should already have required sequence of images. Select your render type and select files to upload - you will see the list of uploaded renders under the “Result” headline. From this list you can replace renders individually (hover with your mouse to the point and press “Delete central panorama”) or delete points altogether if necessary (“Delete point”).
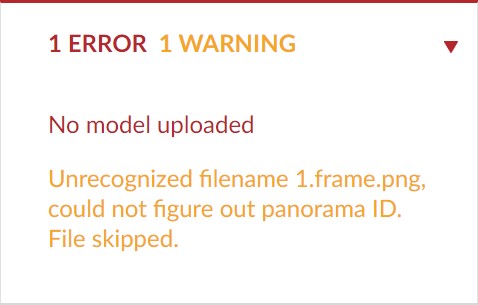
If some of uploaded files do not comply with the requirements, you will receive an error message in the bottom of the screen. Creating the tour will not be possible, unless every error has been addressed.
You may also want to upload binocular panoramas. Each binocular 12x1 panorama should have regular 6x1 equivalent.
Uploading 3d model
Next, upload 3d model of the scene. By default we expect to receive high poly .obj file, which will be optimized by our algorithm. You can follow our “Preparing geometry for Virtoaster” guide to perform all necessary actions and export .obj file with proper settings.
Alternatively you can upload low poly model of the scene yourself. Model should not exceed 50 mb and should not exceed 200-300k polygons, otherwise you may face performance issues when loading and viewing the tour. Low poly model should not contain texture coordinates, model should be scaled in meters. Do not forget to uncheck “Optimize 3d model” flag when uploading.
You can also uncheck "Create 3d panorama view" flag to prevent this process in our software. This might save some time of tour processing if you do not want 3d panorama mode anyway. Note, however, that you can not create 3d panorama separately from assembling the tour and, thus, it will be unavailable to your until complete tour reassembly.
Important: you can disable or enable 3d panorama mode anytime in tour options instead.
Uploading coordinates
Finally, there are coordinates of rendered panoramas. By default we recognize these coordinates from 3d model of the scene and auxiliary objects, created by our camera script. If you’ve followed instructions on how to set camera and uploaded high poly model of the scene you may skip this step.
Otherwise, you should use our camera creation tool to create .txt file with the coordinates (more details in Setting up camera guide). Upload these coordinates with file or copy-paste them into the text field. System will perform coordinates check and will show error messages if something is not in order.
Once all the assets are uploaded and all error instances are resolved, you will be able to press “Create tour” in the bottom of the page. Your tour will be added to the queue, you will receive an email when it will be processed.
When your tour will be complete, do not forget to change its status to “Published”. Follow this guide to access your tour, change status and share it.
If you are unable to complete tour at the moment, you can always close the page and return to it later - this tour will be available from your user account. Unfinished tour are locked in “Loading” status inside parent folder. Press “Delete” from tour list if you do not intent to complete the tour.
