Setting up 360 render
Summary
- Set render resolution and number of frames to render
- Select camera type
- Disable post processing effects
- Proceed with 360 renders post processing
Full guide
Important: you can set core render settings with Virtoaster Camera tool script. Nonetheless, it is required to manually disable post processing effects, if there are any (see the end of the article).
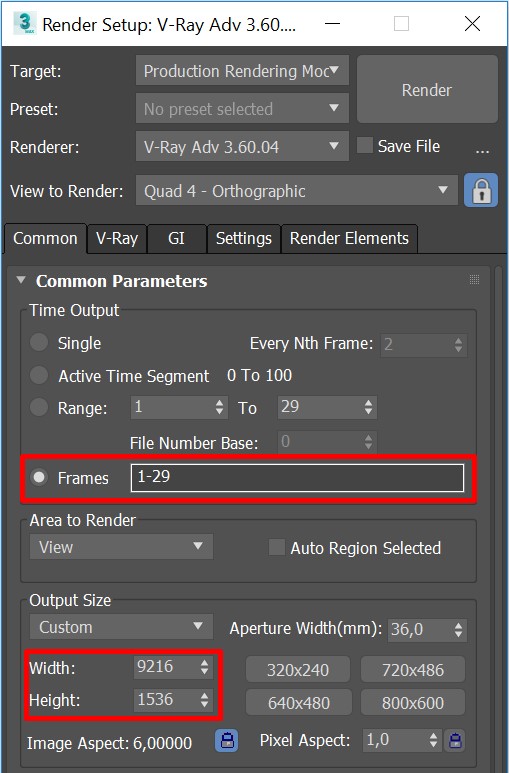
Go to Render setup (F10), you need to specify the range of frames to render from the first to the last keyframe of the animated Virtoaster camera. Each frame corresponds to a single point in a tour.
Set render resolution to 9216x1536px.
Change the type of camera.
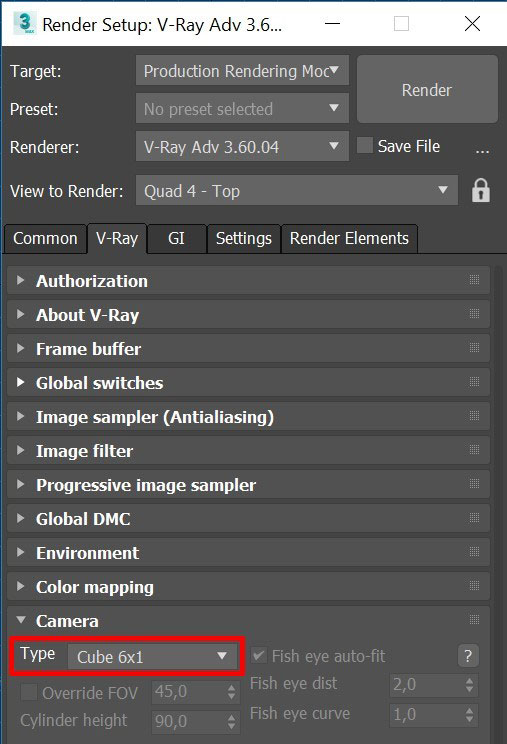
For V-Ray:
Open V-Ray tab. Set the camera type to Cube 6x1 (Render Setup/tab V-Ray/Scroll Camera/Type: Cube 6x1).
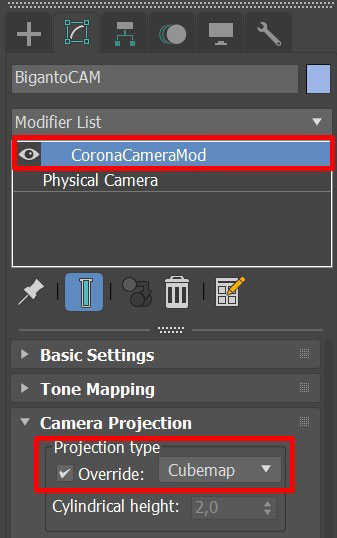
For Corona:
Select Virtoaster Camera. From the Modifier list add “CoronaCameraMod” modifier. In CameraProjection scroll check the box at ProjectionType/Override. Select Cubemap in the dropdown list.
Important: disable native Sharpening from Corona render. Disable any form of post processing effects, including vignetting, DoF, motion blur effects. This will result in visible seams between parts of 360 render! The only effect you may use when rendering cubemaps is Corona Bloom and Glare, and even than, use these effects with caution, as they may still slightly impact sides of cubemaps.
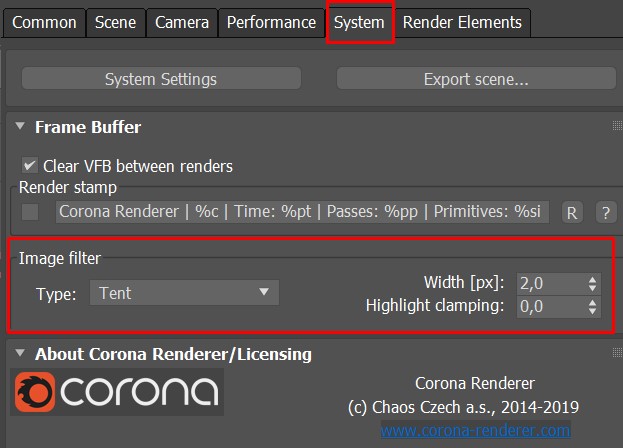
Important: if you are using Corona 4.0 or newer, we recommend to disable High Quality image filter under System tab. High quality image filter sometimes causes visible seams on the Cubemaps. Please select "None" or "Tent" under image filter type.
Select the folder you want to save your sequence and required render channels.
Important: we do not recommend to use JPEG file format for render output and post processing. When uploading 360 renders to the tour, the engine will automatically convert and transform them into JPEG to show images in browser. Thus the images will be compressed twice: when rendering/adding post effects and when uploading to the tour!
Once your renders are complete, you may proceed with image post production.