Releasing your tour
So, you’ve received an email notification that 3d tour is ready. Now it is available in your tour list and you can view it, but there is still a couple of things left to do.
To open the tour you can follow the link in the email or you can access it from your account. Press right mouse button on your account name and select “Tours” from dropdown menu, you will enter folder list.
There are three ways you can interact with a tour:
- View only mode
- Editing mode
- Assets editing mode
“View only” is the default way you see a tour, no special tools are available here. You can access it by pressing “View tour” or “Open in new window” buttons, or by following the link in your email.
“Editing mode” is an alternative mode of web player. You can travel across the space the same way you do in “View only” mode, but “Editing mode” also contains a set of tools to add extra features.
“Asset editing mode” is a web page, where you can add, edit, change and replace assets and points in your tour. You can access it by pressing on the tour thumbnail in your tour list. Asset editing mode is where you might spend some time, when you will need to reflect changes in your 3d scene or if any errors in a tour will occur.
Now, when you know how to access different view modes, you might want to test the tour and add some final details:
- enter View mode and check if everything works fine and your renders look good in a tour. If you would like to fix a render or something is not working right in a tour, please, check our troubleshooting guide
- enter Editing mode and change starting point if necessary. Add extra features like tour navigation, interactive objects, prerecorded routes, etc. You can learn more details in this article.
- enter Asset editing mode and add a minimap to your tour (see “Rendering floor plan” article).
You may have already noticed, that your tour has “Testing” status. You can share and edit this tour, however you should know that tours with “Testing” status have limited lifespan and will be deleted sometime in future (this is because original assets are kept in tours with “Testing” status, thus they can take several gigabytes of space).
To avoid deletion, you are required to change tour status to “Published”. Open asset editing mode and change the status, when you are ready. Note, that original assets will be deleted and you will not be able to edit some parts of the tour without assembling it again.
You can share a tour with http link. In your tour list, hover over the tour with mouse and look for “Copy link” icon.

You can also get a link for the tour or even a link to specific place in a tour from view mode. Open a tour in View mode and look for the “Tour link” icon in the toolbar.
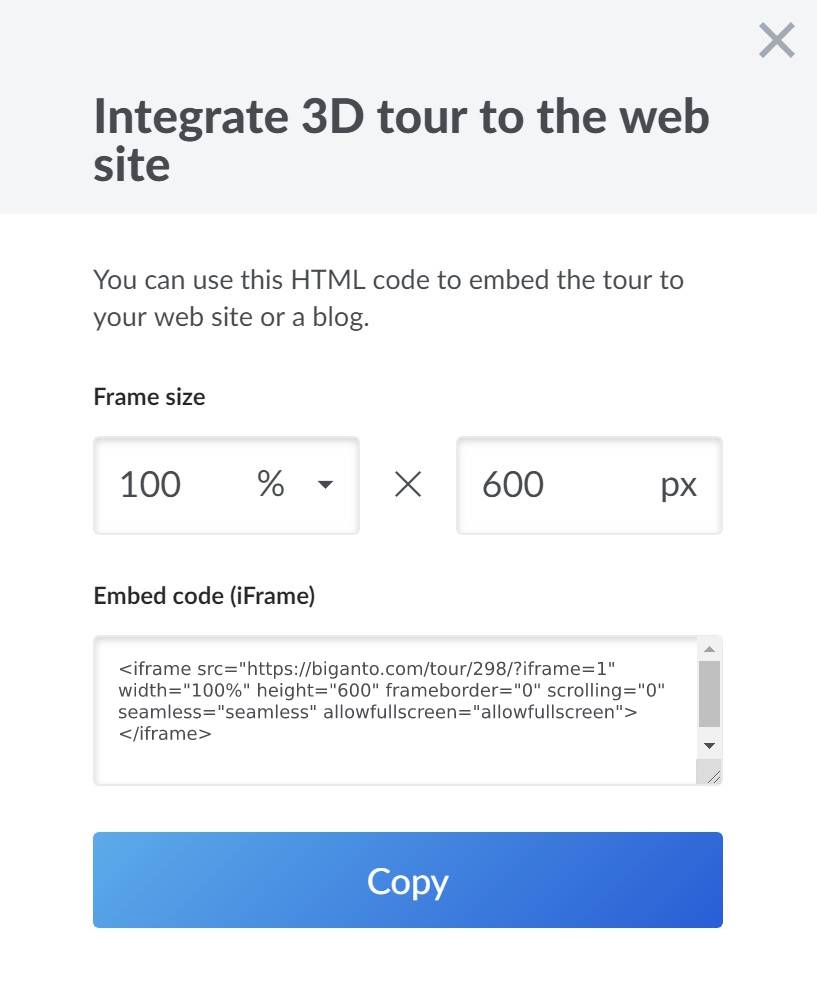
Finally you can embed a tour to your website or blog with an iFrame. iFrame is a web technology that allows to add different embedded content in a separate space on the web page, very similar to adding a Youtube video.
To get your embed code, hover over the tour with mouse and look for “Get embed code” icon.

Click on the icon, your embed code will be generated. You may change embed window size in the interface, these changes will be reflected in iFrame code immediately.
Finally, your tour is ready and can be shared! To make it even better, you can also add minimap, interactive objects and other features to make the most out of your project!