Rendering floor plan
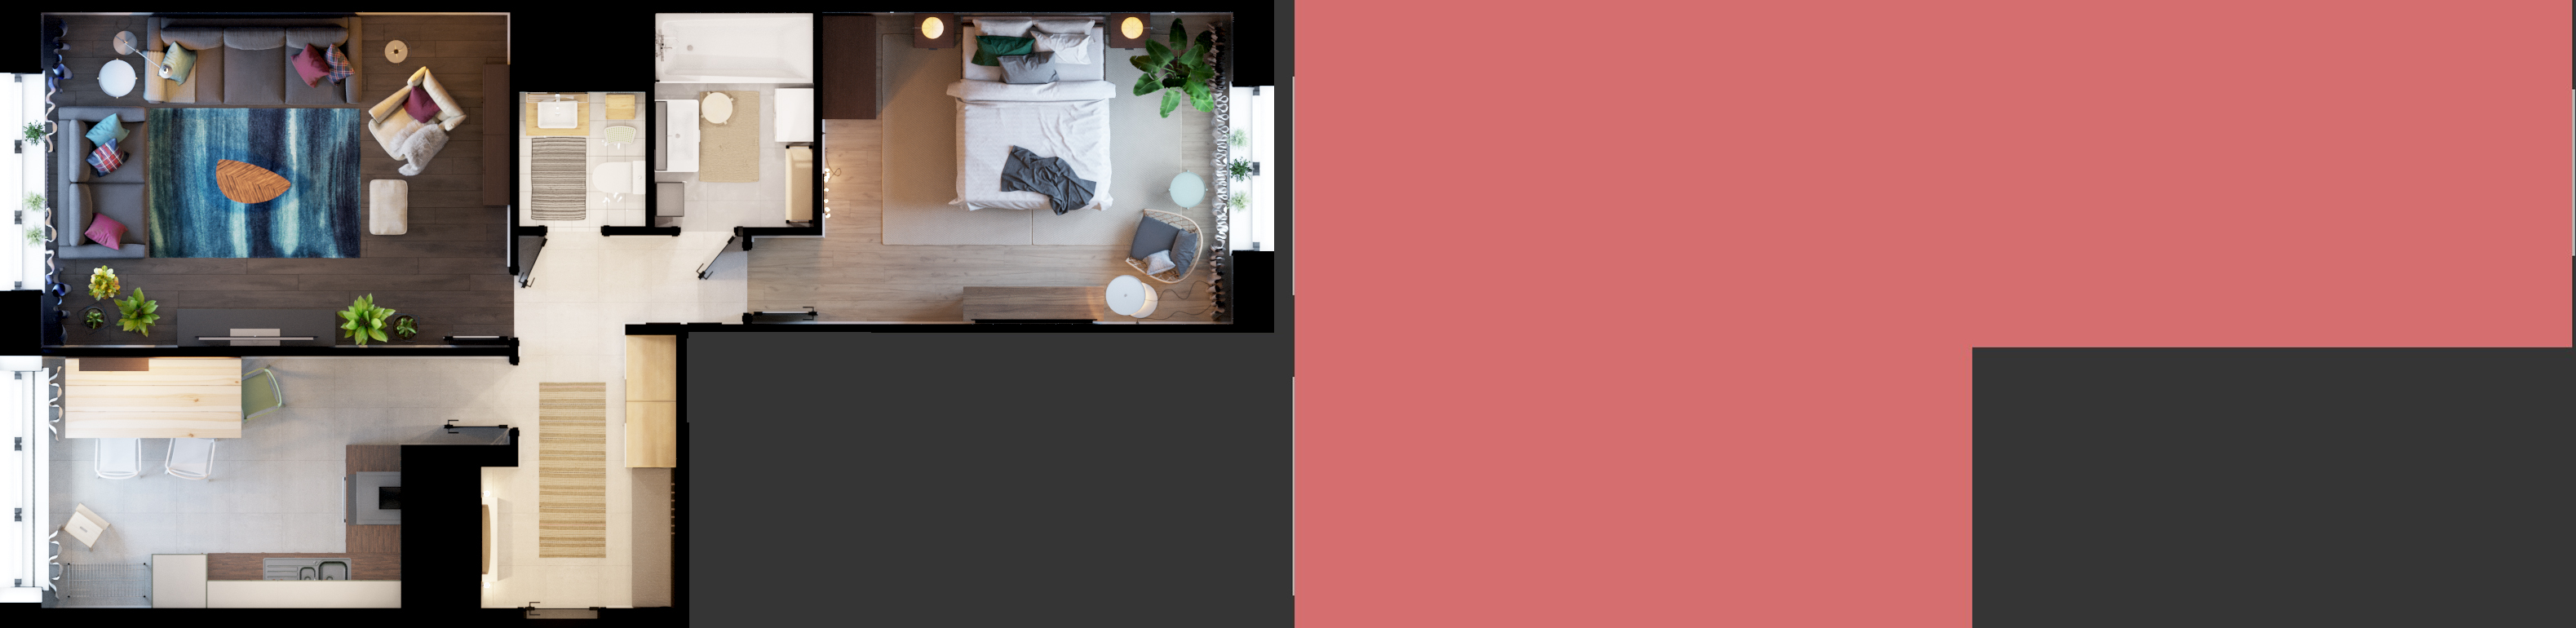
Floor plan is a simple image of an interior using orthographic projection. It simplifies navigation through the tour and provides better understanding of a space.
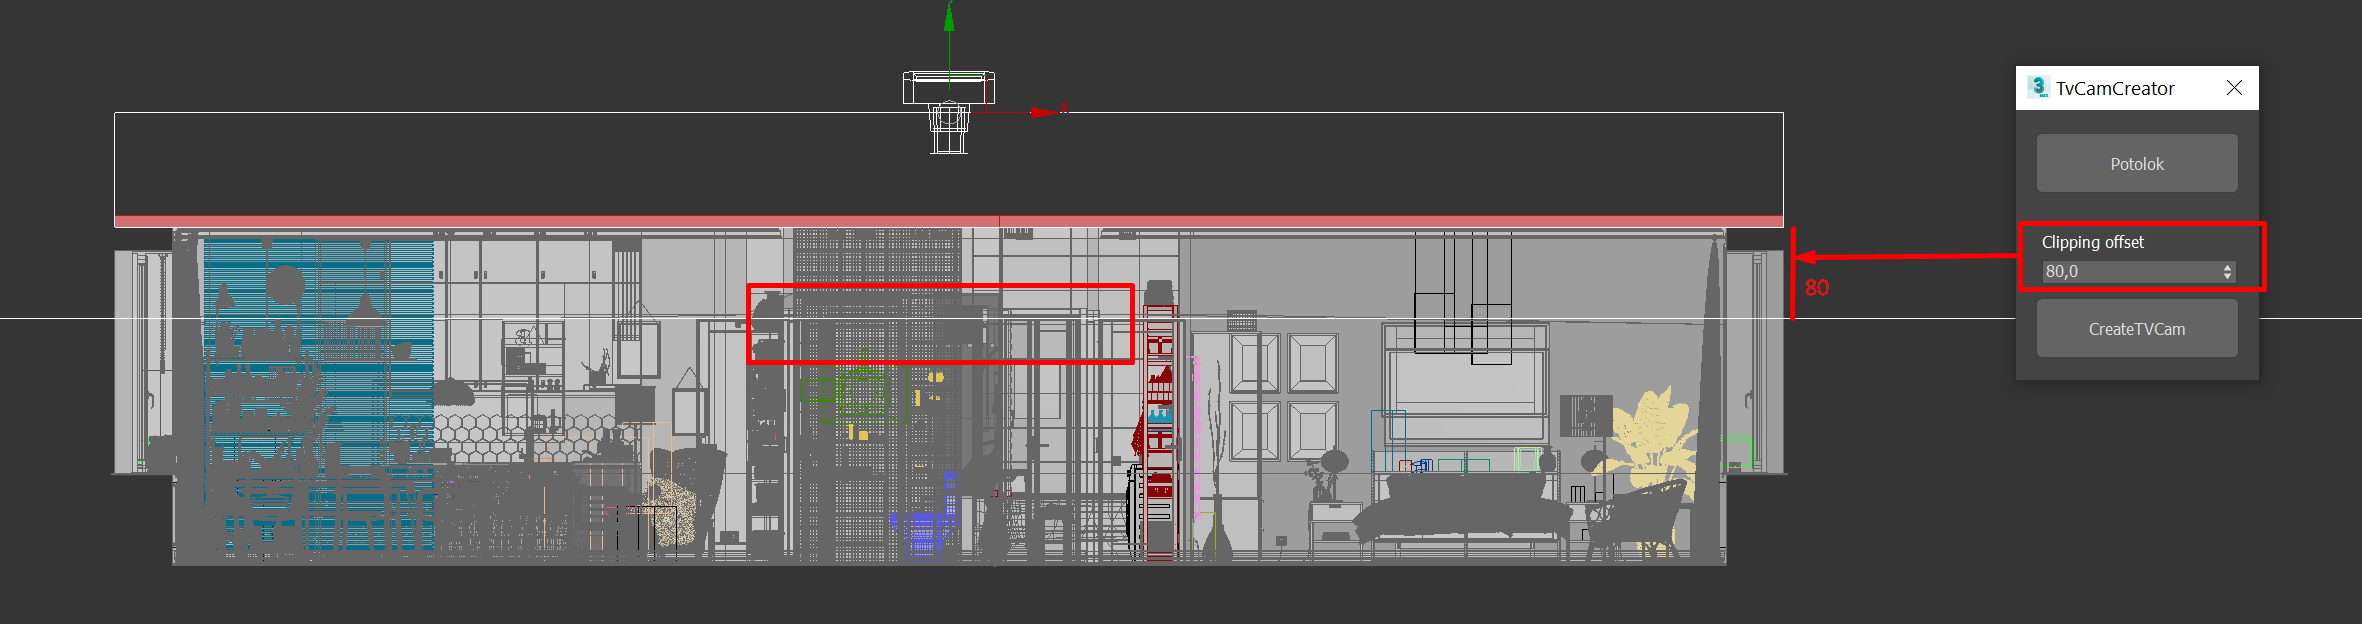
To simplify the process of floor plan rendering, we suggest to use a simple tool - a Camera TopMap. Drag’n’drop the script in 3d max viewport, you will see the following interface:
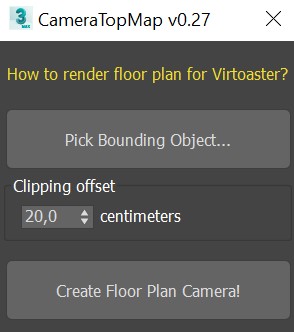
This tool will create an orthographic camera with clipping settings and will set proper render proportions and resolution. Script will adopt to your render engine and will pick appropriate camera.
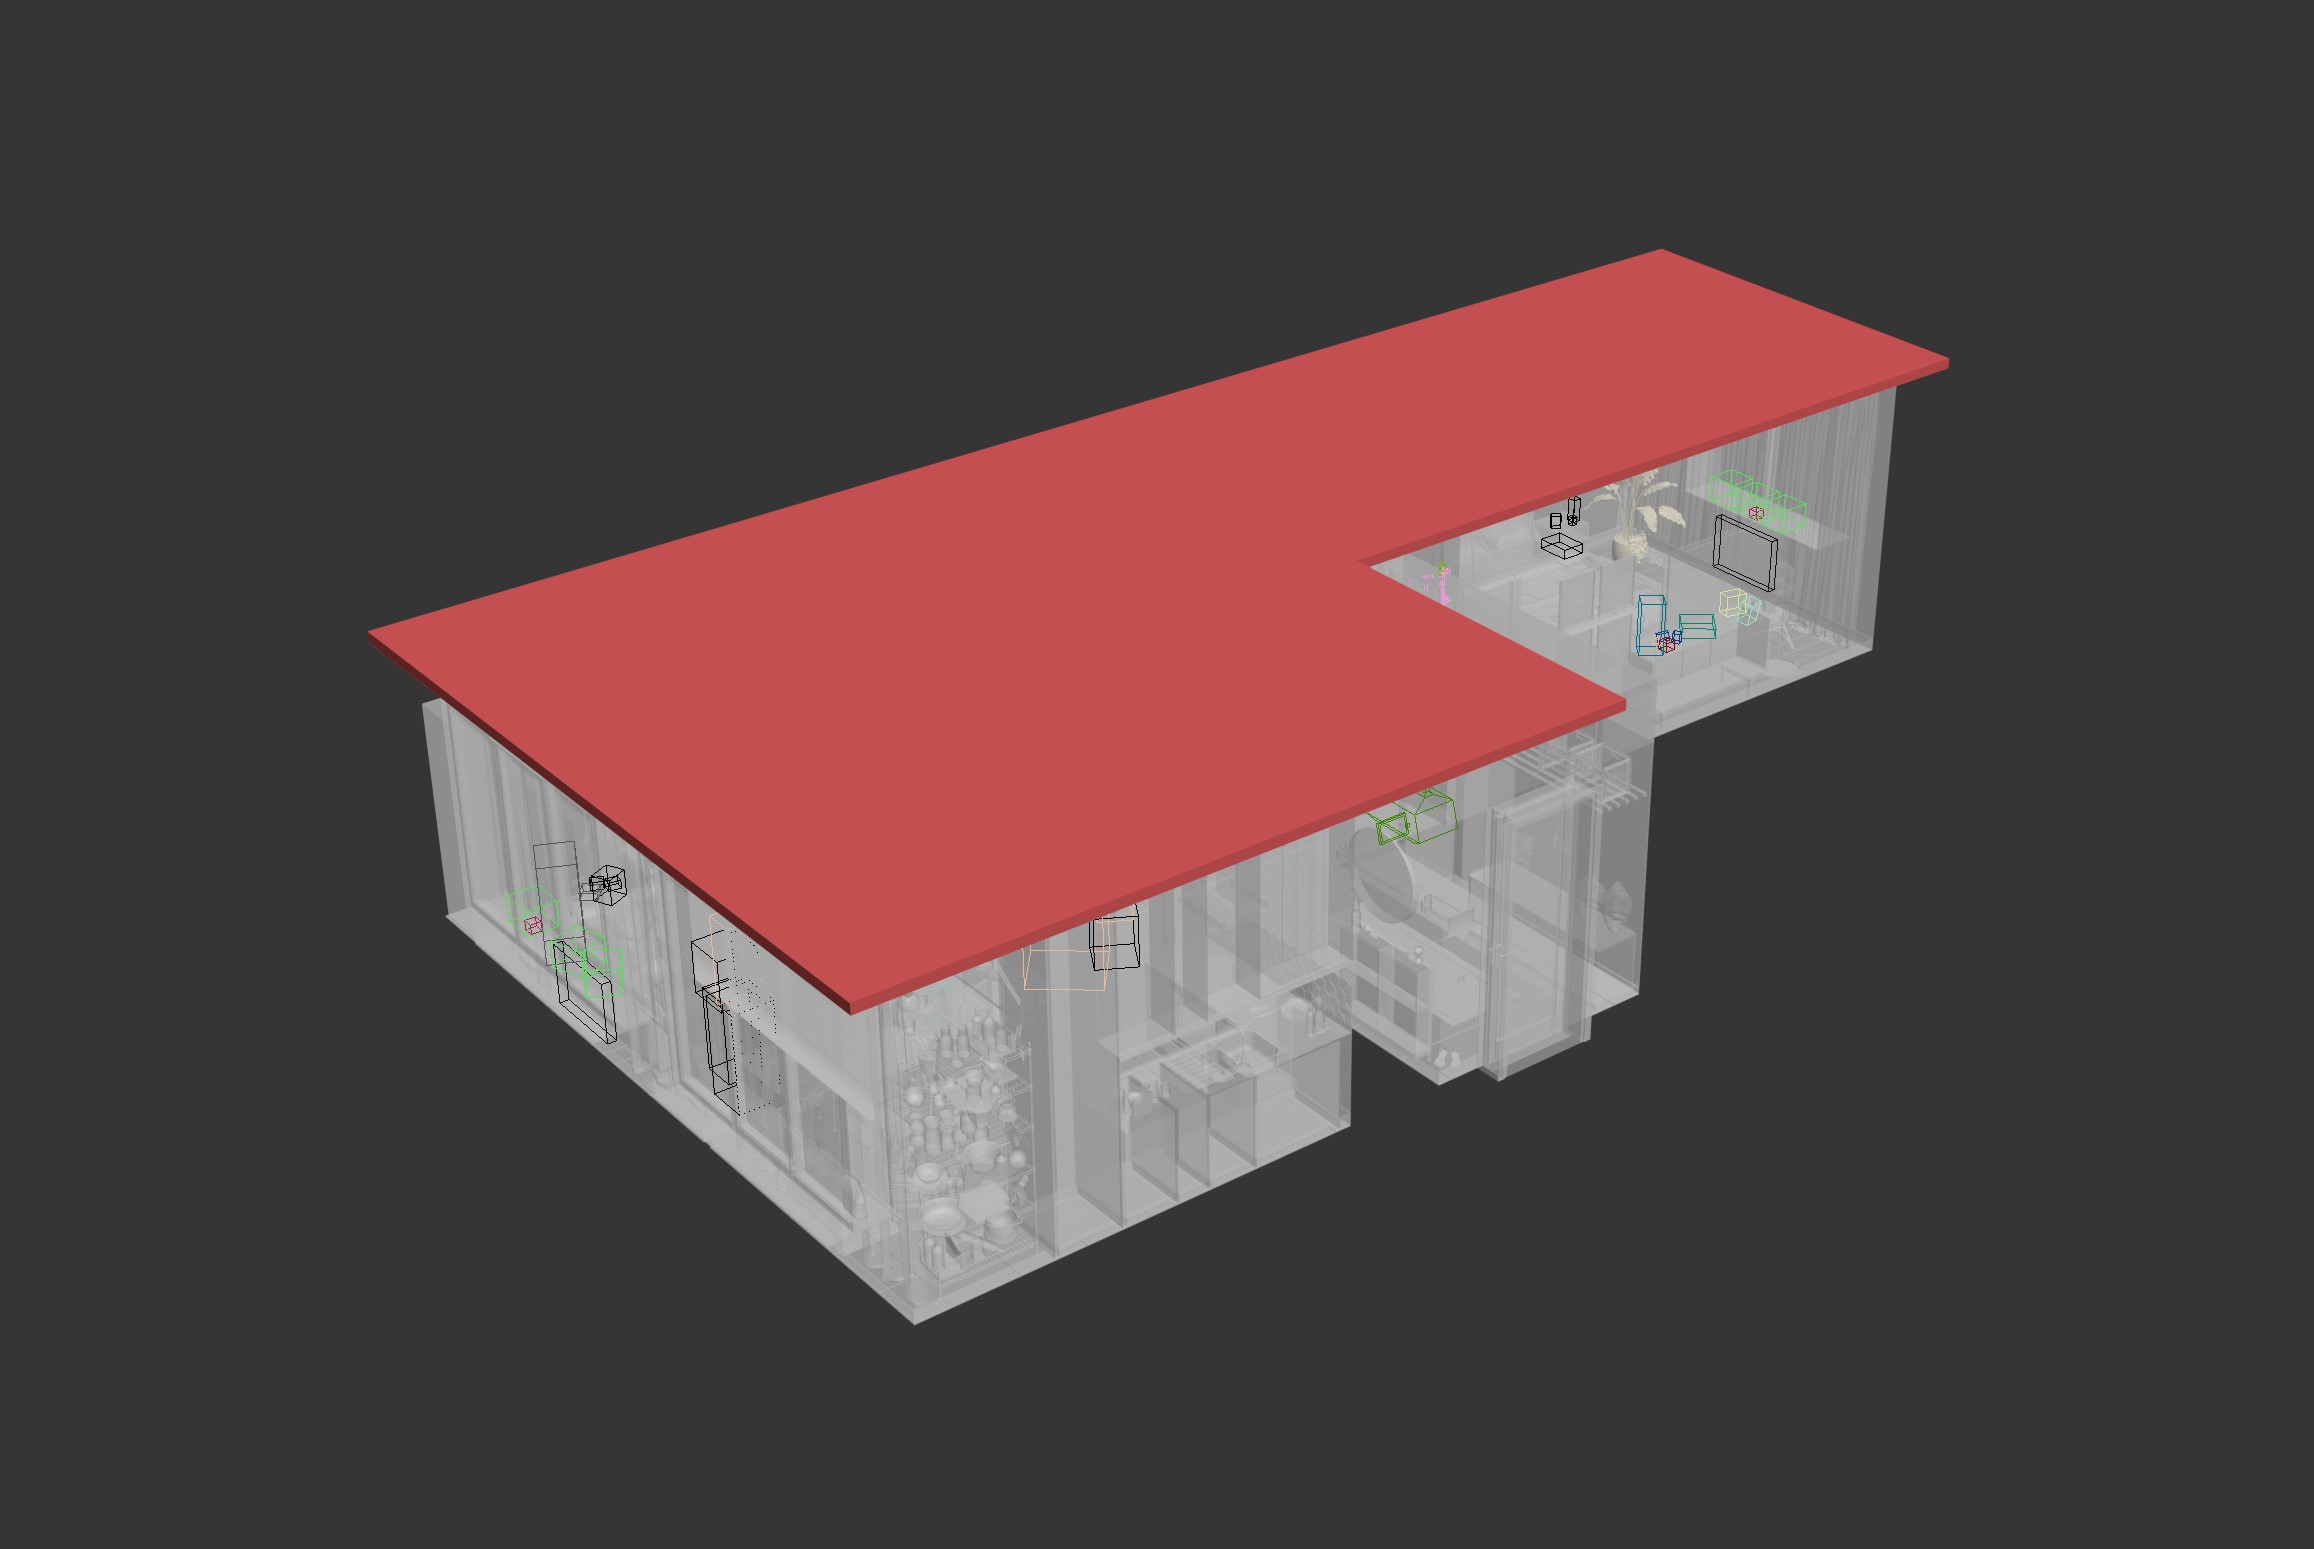
Set viewport to Top view (hotkey T). Select an object to act as a bounding box. This object should cover the whole interior. In many cases ceiling may act as such bounding box, when it is single object in 3d Max, as shown on the image below (in red):
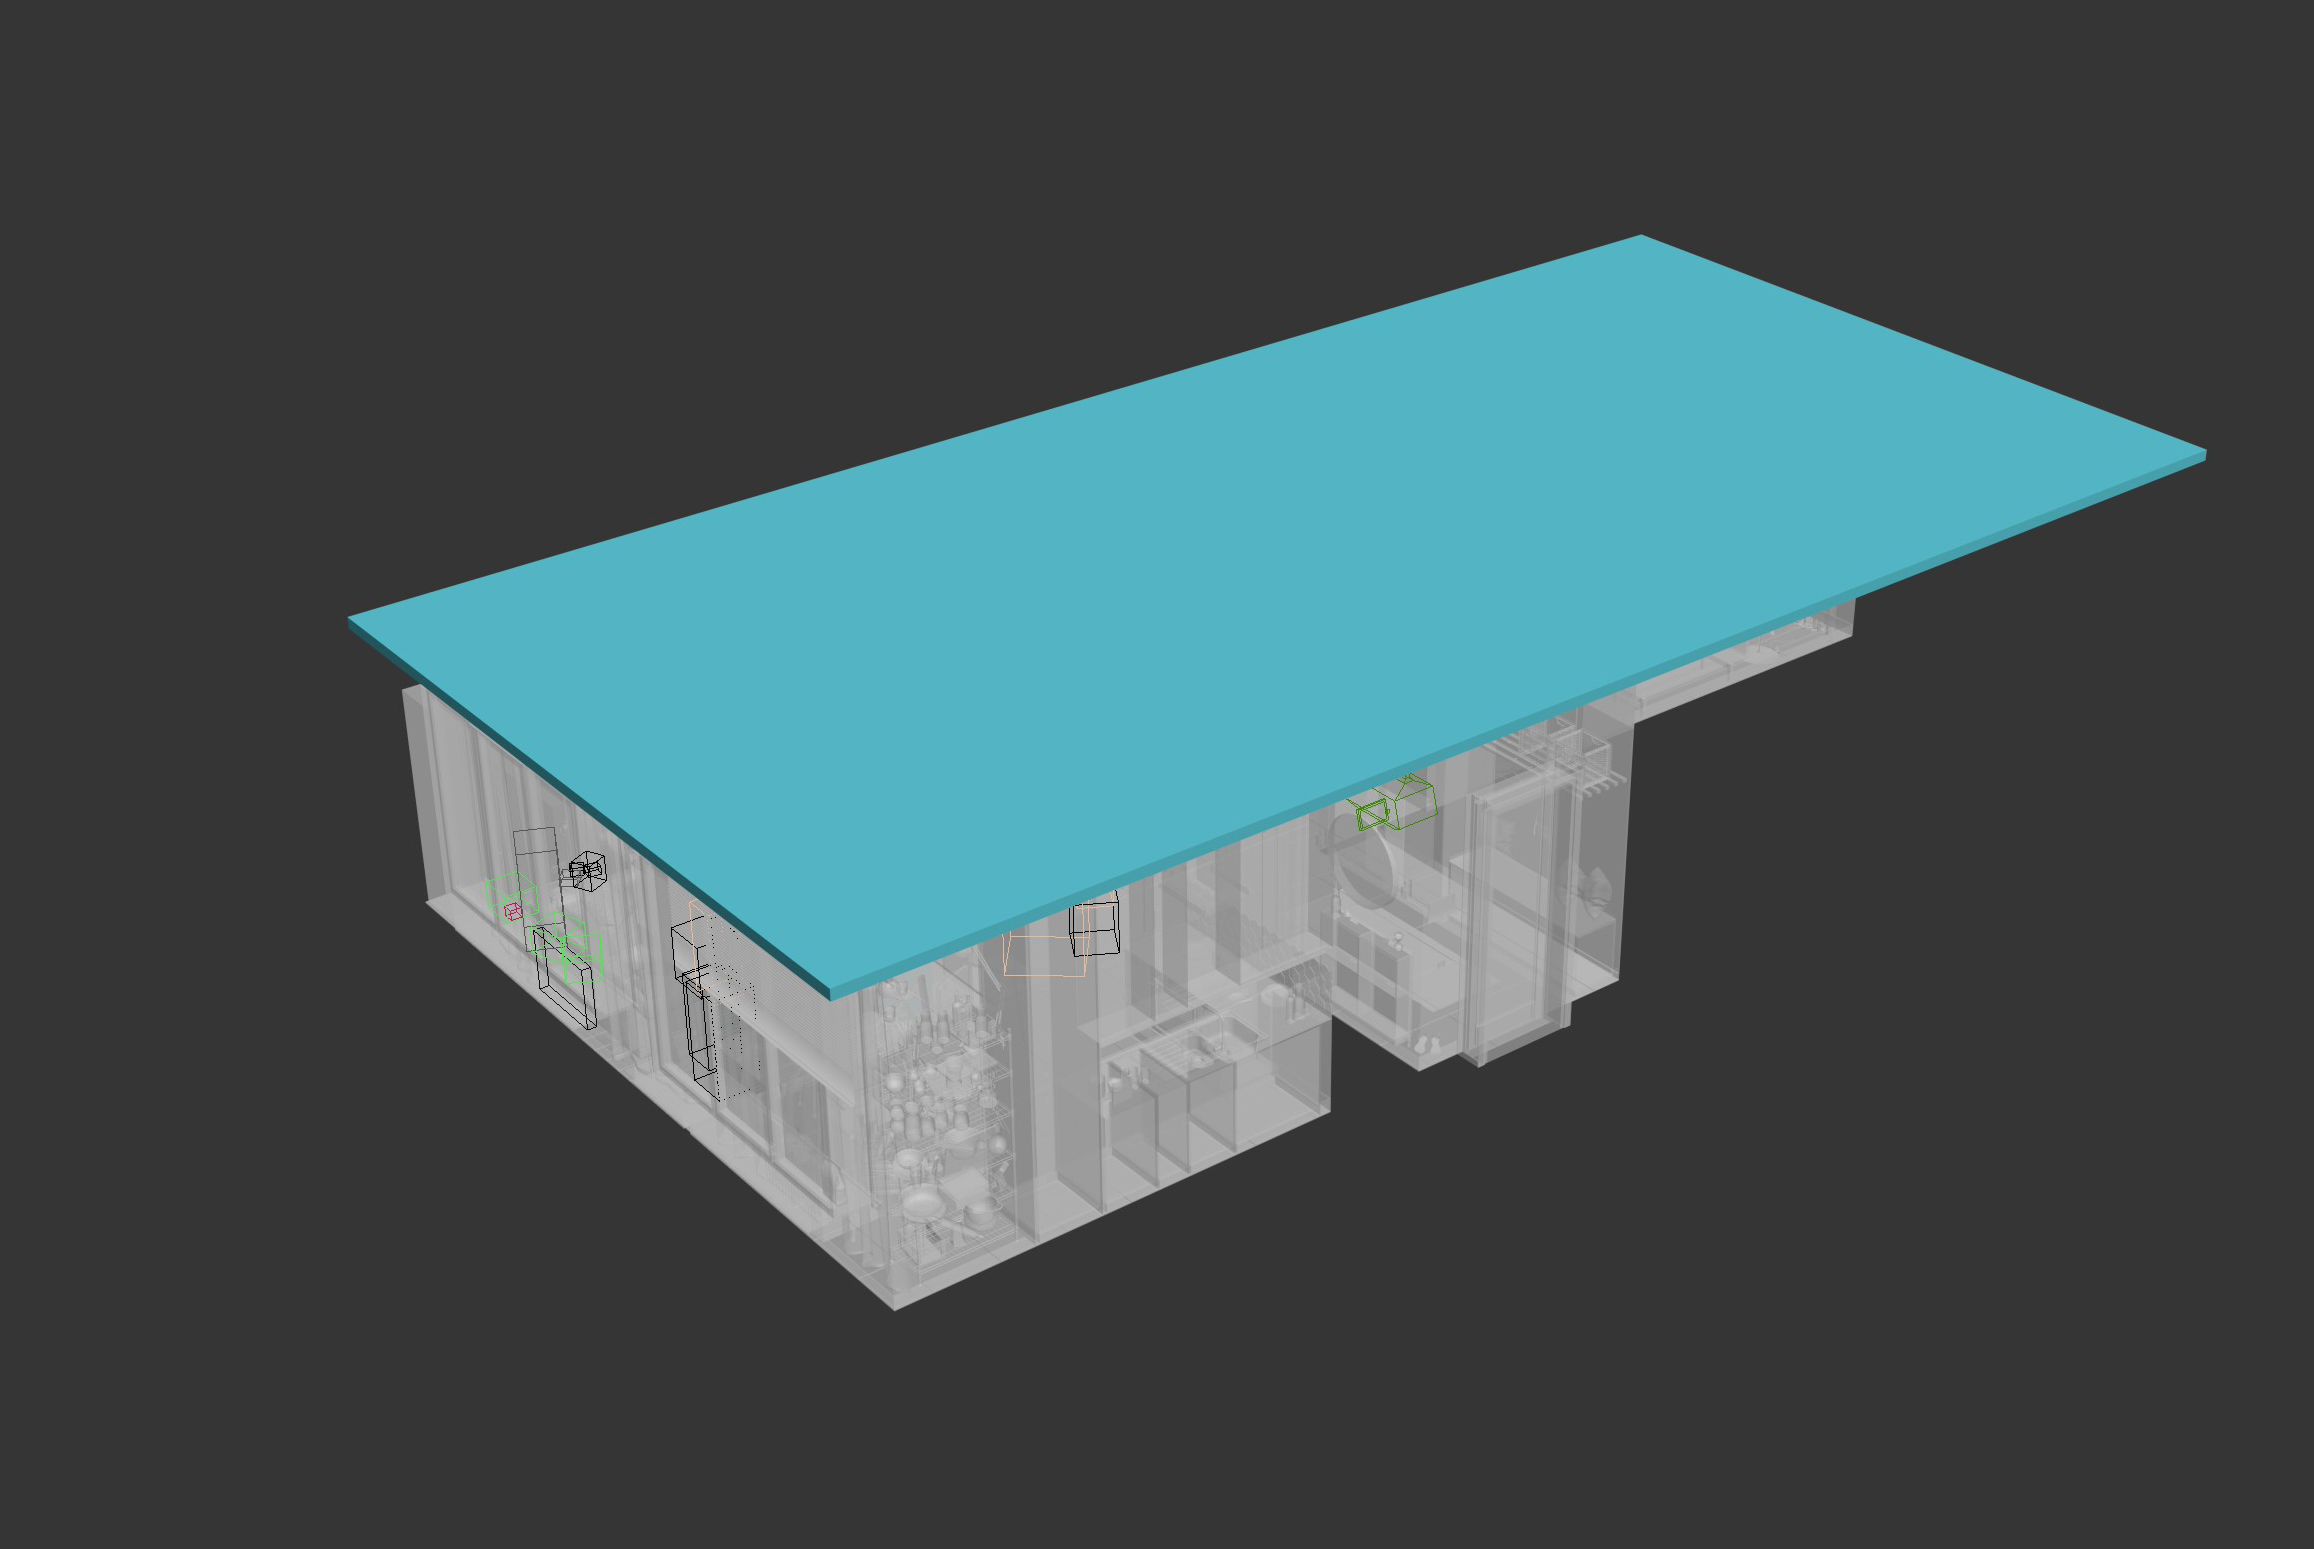
If you do not have appropriate bounding object, you can create a box on top of your interior (in blue):
Our script will set render resolution and camera angle, so that floor plan proportions will match bounding object exactly. For this particular example rendered floor plan on the left matches perfectly with a bounding object on the right:
Press “Pick bounding object” in script interface and select it with the left mouse button.
Specify “Clipping offset” - this is the value, defining how “deep” you would want to look inside the interior (see the image below).
Press “Create TV cam” to create a camera. Camera will be created slightly above your bounding object:
Important: to make the most appealing floor plans, set Clipping offset value so that your clipping plane would be slightly below the doorways. This way floor below doorways will be visible and you will clearly see where it is possible to walk around and where it is not. You can always adjust clipping plane height in the camera settings (“Near” value, under Environment & Clipping block) .
You are ready to render the floor plan! Let’s proceed with uploading the plan to 3d tour.
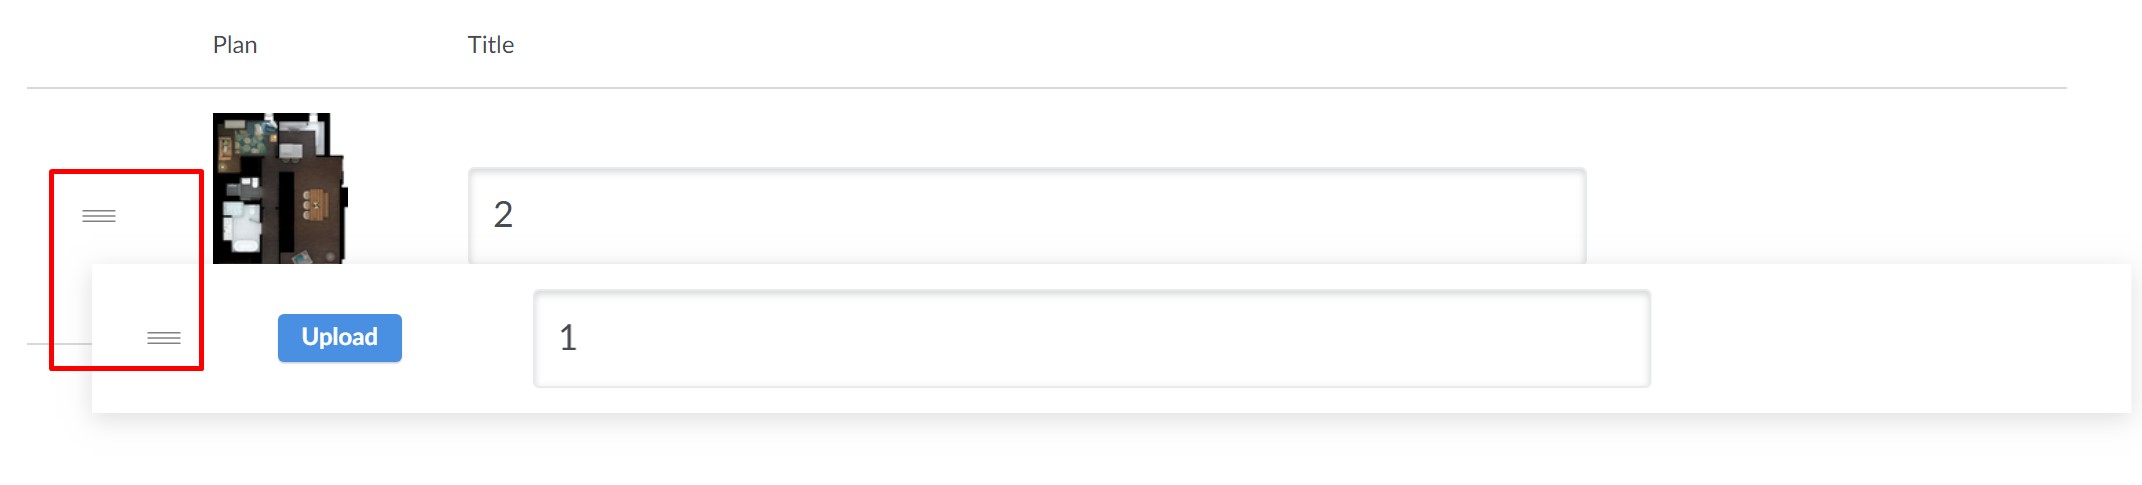
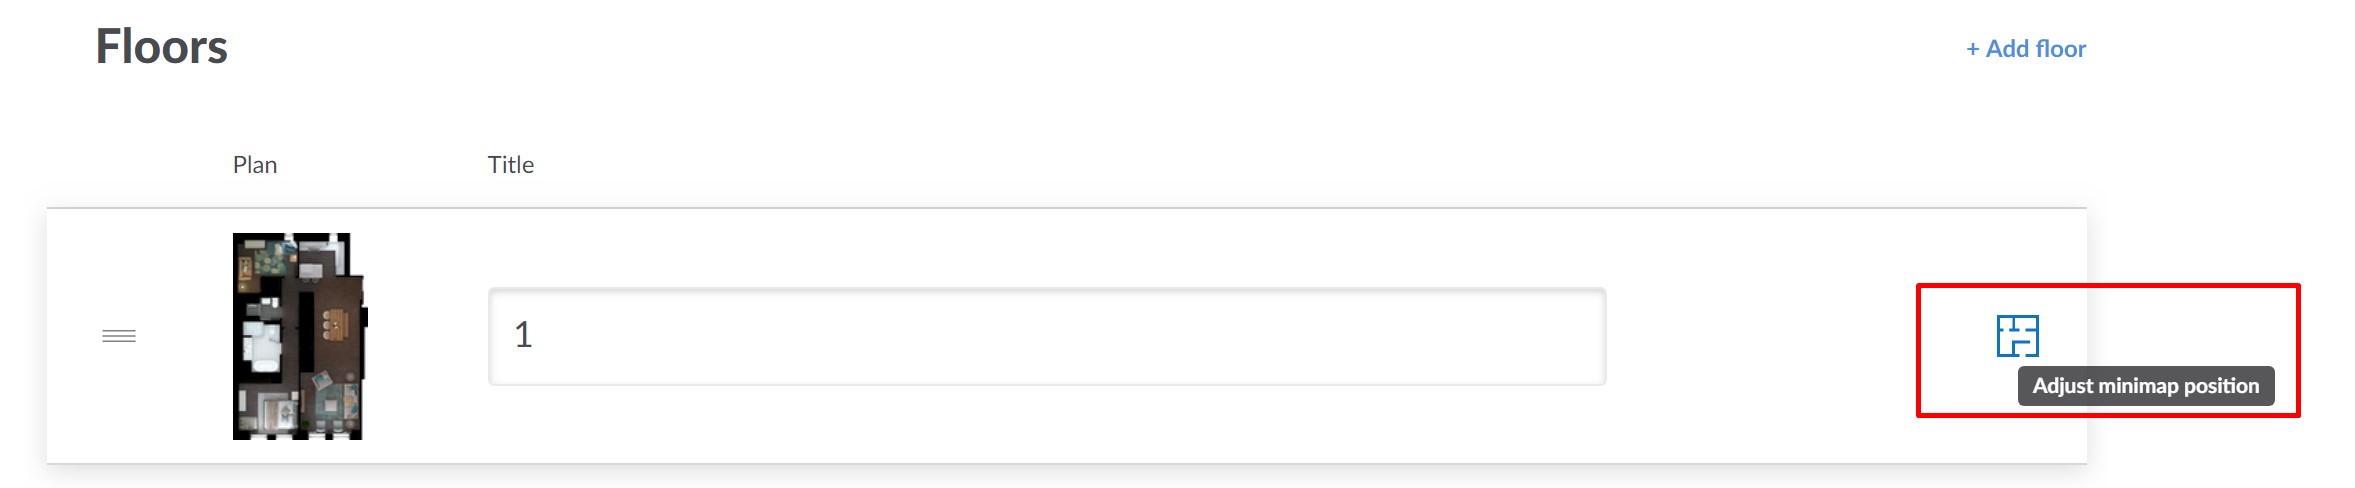
Enter the assets editor of your 3d tour by clicking on tour thumbnail. Look for the “Floors” section of the page:

By default every tour has at least one floor. Type floor title if you want to change it and press “Upload” to add rendered floor plan. You can drag’n’drop your floor plan or select a file path.
Important: floor plan direction should follow the direction of low poly model of your scene to be compatible. You should not turn or rotate the floor plan rendered with our script.
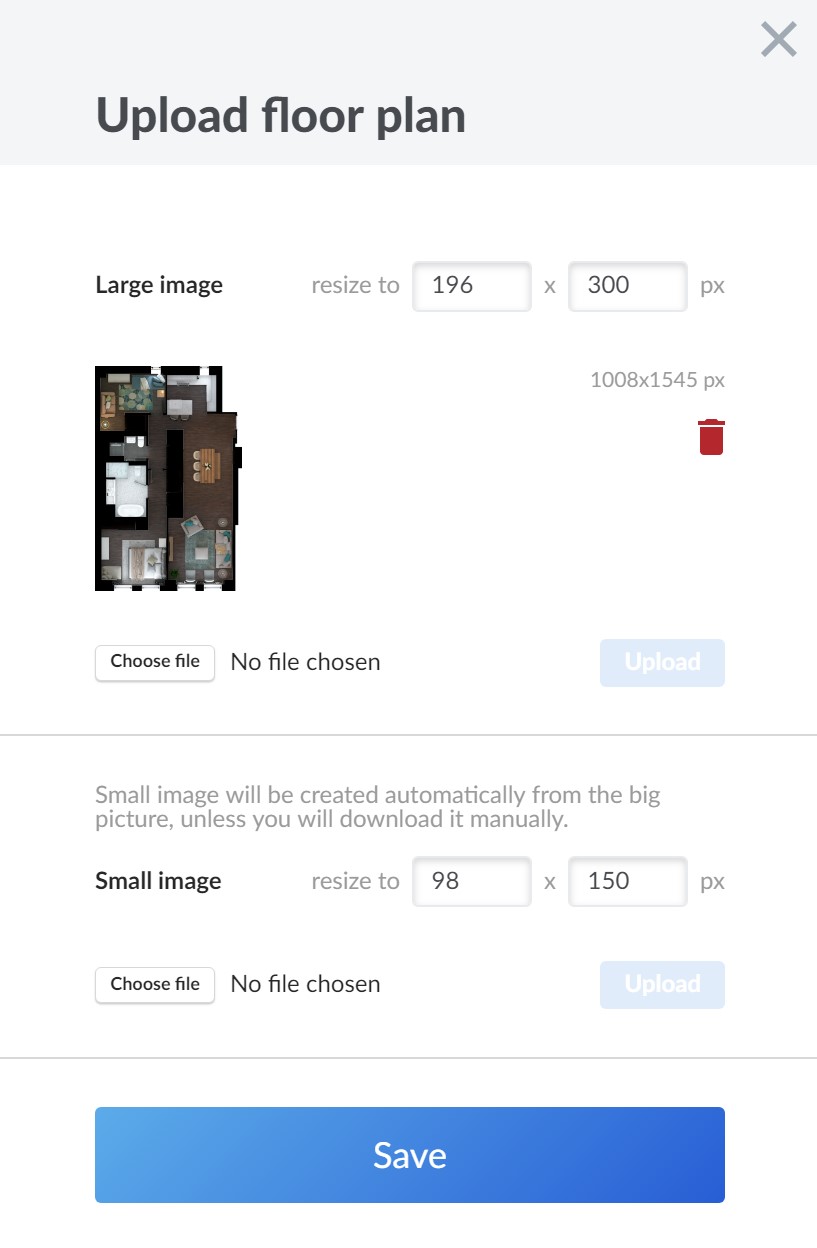
There are two floor plan sizes for user convenience, they can be expanded or disabled when walking around the tour. By default they are 300 px for larger image and 150px for smaller image, but you can change these values manually if you want to. Small image will be created automatically from the larger one, unless you will download it manually.
Once you have a minimap in place, hover mouse over the floor and press “Adjust minimap position”:
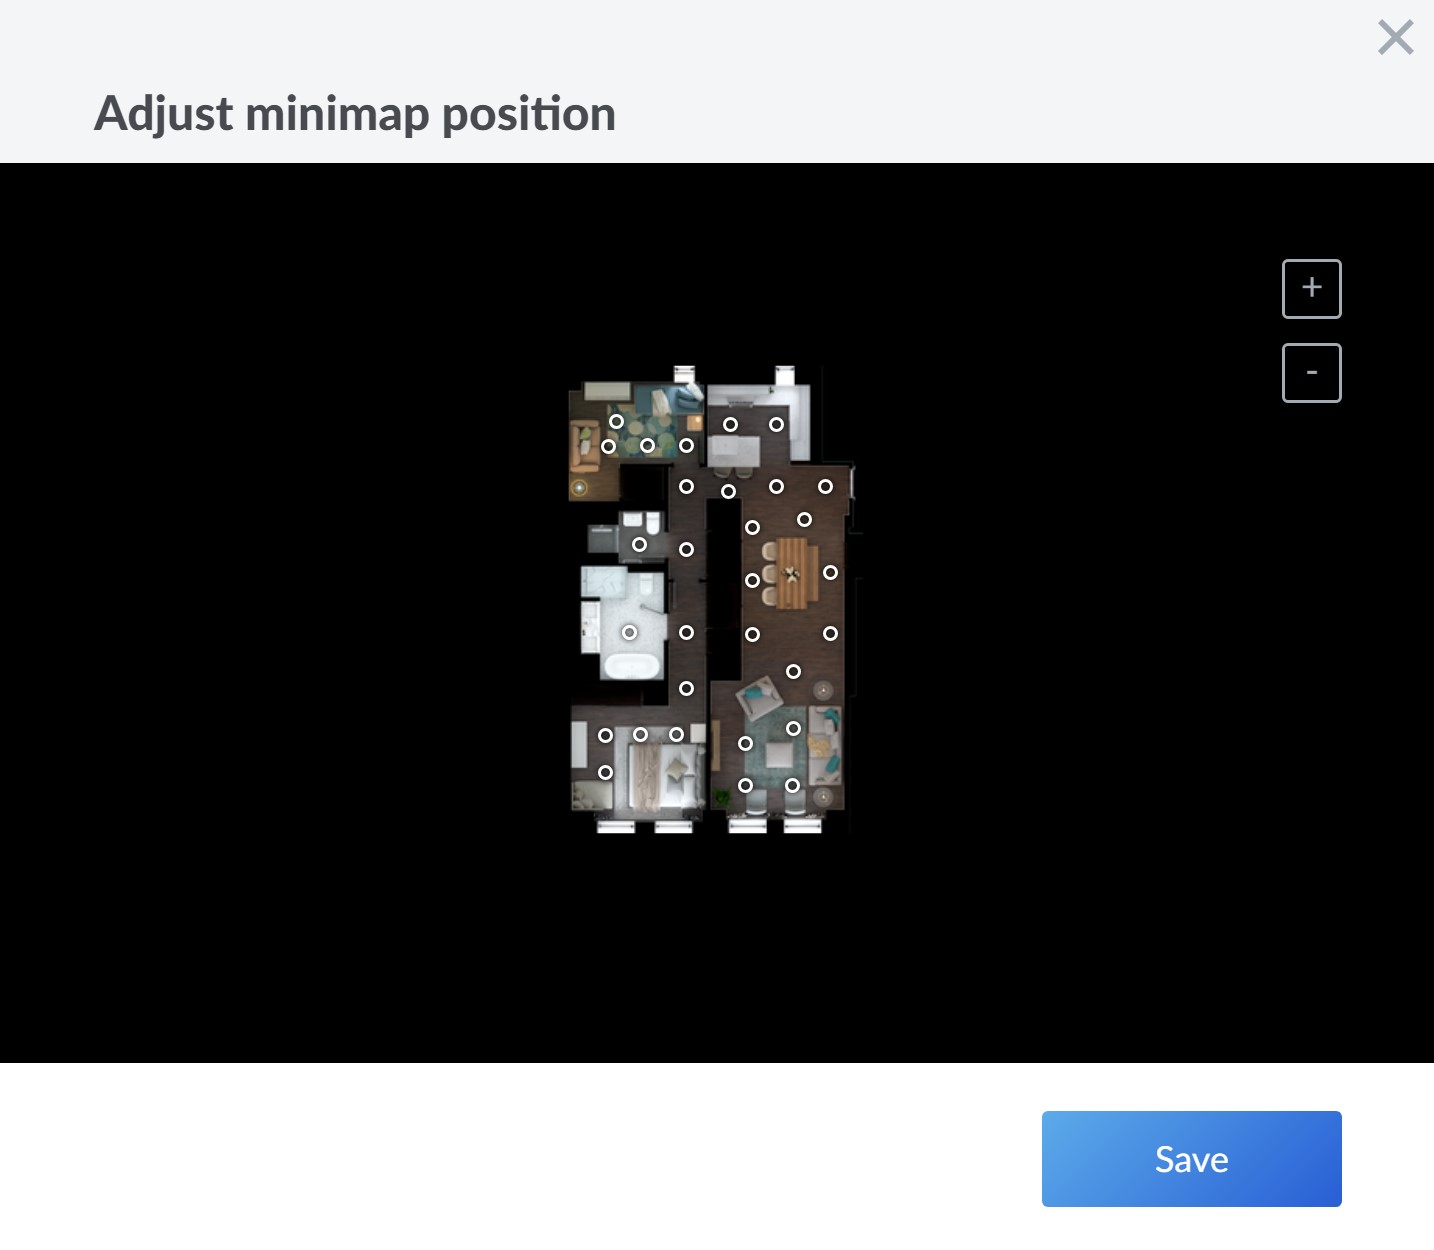
If points in a tour are not in line with the minimap, you can change it here. Move and zoom your minimap with mouse to fix any issues with floor plan.
If you have more than one floor, you can change minimap order by dragging floors with mouse: