Creating interactive objects
Summary
- Enter editing mode.
- Select type of interactive object you would like to draw, press on the surface you want it to be.
- Use the right mouse button to open the transformation menu to move, scale or rotate the object.
- Use the left mouse button to edit overlay properties or add actions, images, videos. etc.
- Copy or delete objects using right mouse button dropdown menu.
Creating an interactive object
Overlay is an interactive 3d object which exists in the same space as the 3d model of a tour. Thus it may follow the geometry of the underlying 3d model, react to camera movement and interact with 3d objects.
Every overlay has two distinctive parts. First part is its visual options (whether it is text or image, its size, position, how it will react when mouse hover will happen, etc.), second part is an action which will happen when you interact with overlay. You can use overlays to showcase furniture, open images, videos, websites, etc.
Start with entering editing mode (you can learn more about editing mode in this article). While in editing mode you will see the toolbar on top of the screen, where you can select what type of everlay you want to create

There are five types at the moment, there are small differences in the process of their creation, but it is very simple nonetheless:
- To create Text or Image overlay simply click on the surface you want them to be.
- To create Line overlay press the left mouse button to start drawing the segment of a line and press again to start building the next segment. Press Enter to save all segments except the last one (the segment you are currently dragging with the mouse).
- To create a Polygon, press on the surface and draw a closed shape. Once you close the shape overlay will be created.
- To create an Oval press the mouse button and keep pressing it while dragging the mouse to change the shape.
Important: Press Escape if you want to cancel the overlay creation.
Select the type of object you would like to draw and place it on the desired surface, once you do, the newly created overlay will be selected automatically and the right side menu will change its content. Different overlay types will have different visual properties, most of them are self explanatory like text color, line width, etc.
All overlay types share the same settings for adding Actions. You can create a new action or add an existing one to any overlay. Multiple actions can be attached to the same overlay, but not every combination will work.
Interactive object example
It is best to show how it works with an example you may try within your own tours. Let’s say you want to connect your interior 3d tour with 3d tour of a lobby to create an immersive experience for a customer. Let’s start with drawing the polygon over the apartment entrance:

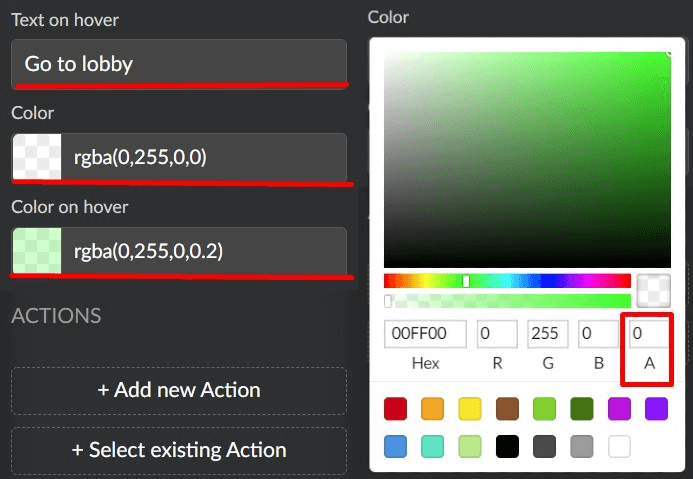
By default you will see a bright green image so it is easier to spot it. However, you can make the overlay transparent by changing the transparency level in the color settings or you can make it appear only when the user hover the mouse over it. Let’s change the settings to something more appropriate and add a text that will appear once you hover the mouse over the door.
Note that the fourth number in RGBA is responsible for transparency of an object, it is 0 for “Color” setting and 0.2 for “Color on hover” setting in the example. Click on color settings to open the color selection menu. You can even paste Hex color code into the menu to be precise.
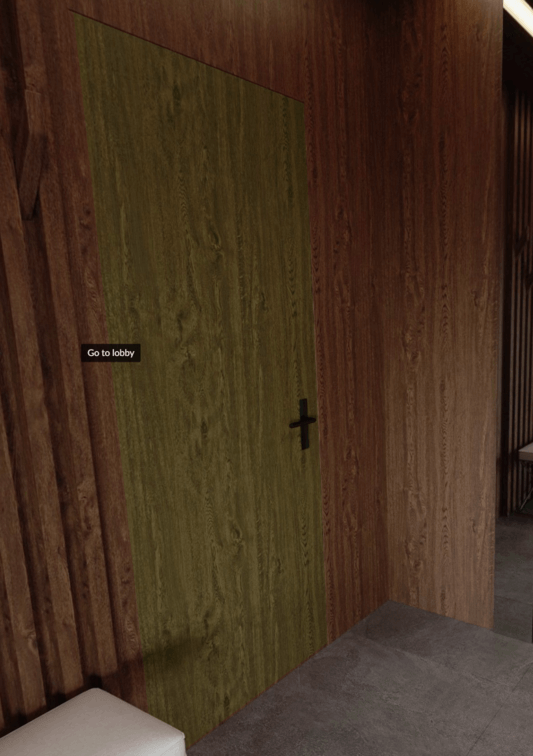
Press “Save” to apply changes to the overlay. Here is the result, the overlay is completely invisible on its own, but becomes visible and shows tooltip once you hover the mouse over it:
Interactive object transformation, actions
To change overlay settings again, select the overlay on the left side of the screen or press on it in the tour with the left mouse button. If you press on it with the right mouse button the transformation menu will appear (it is also present on the bottom right of the screen):
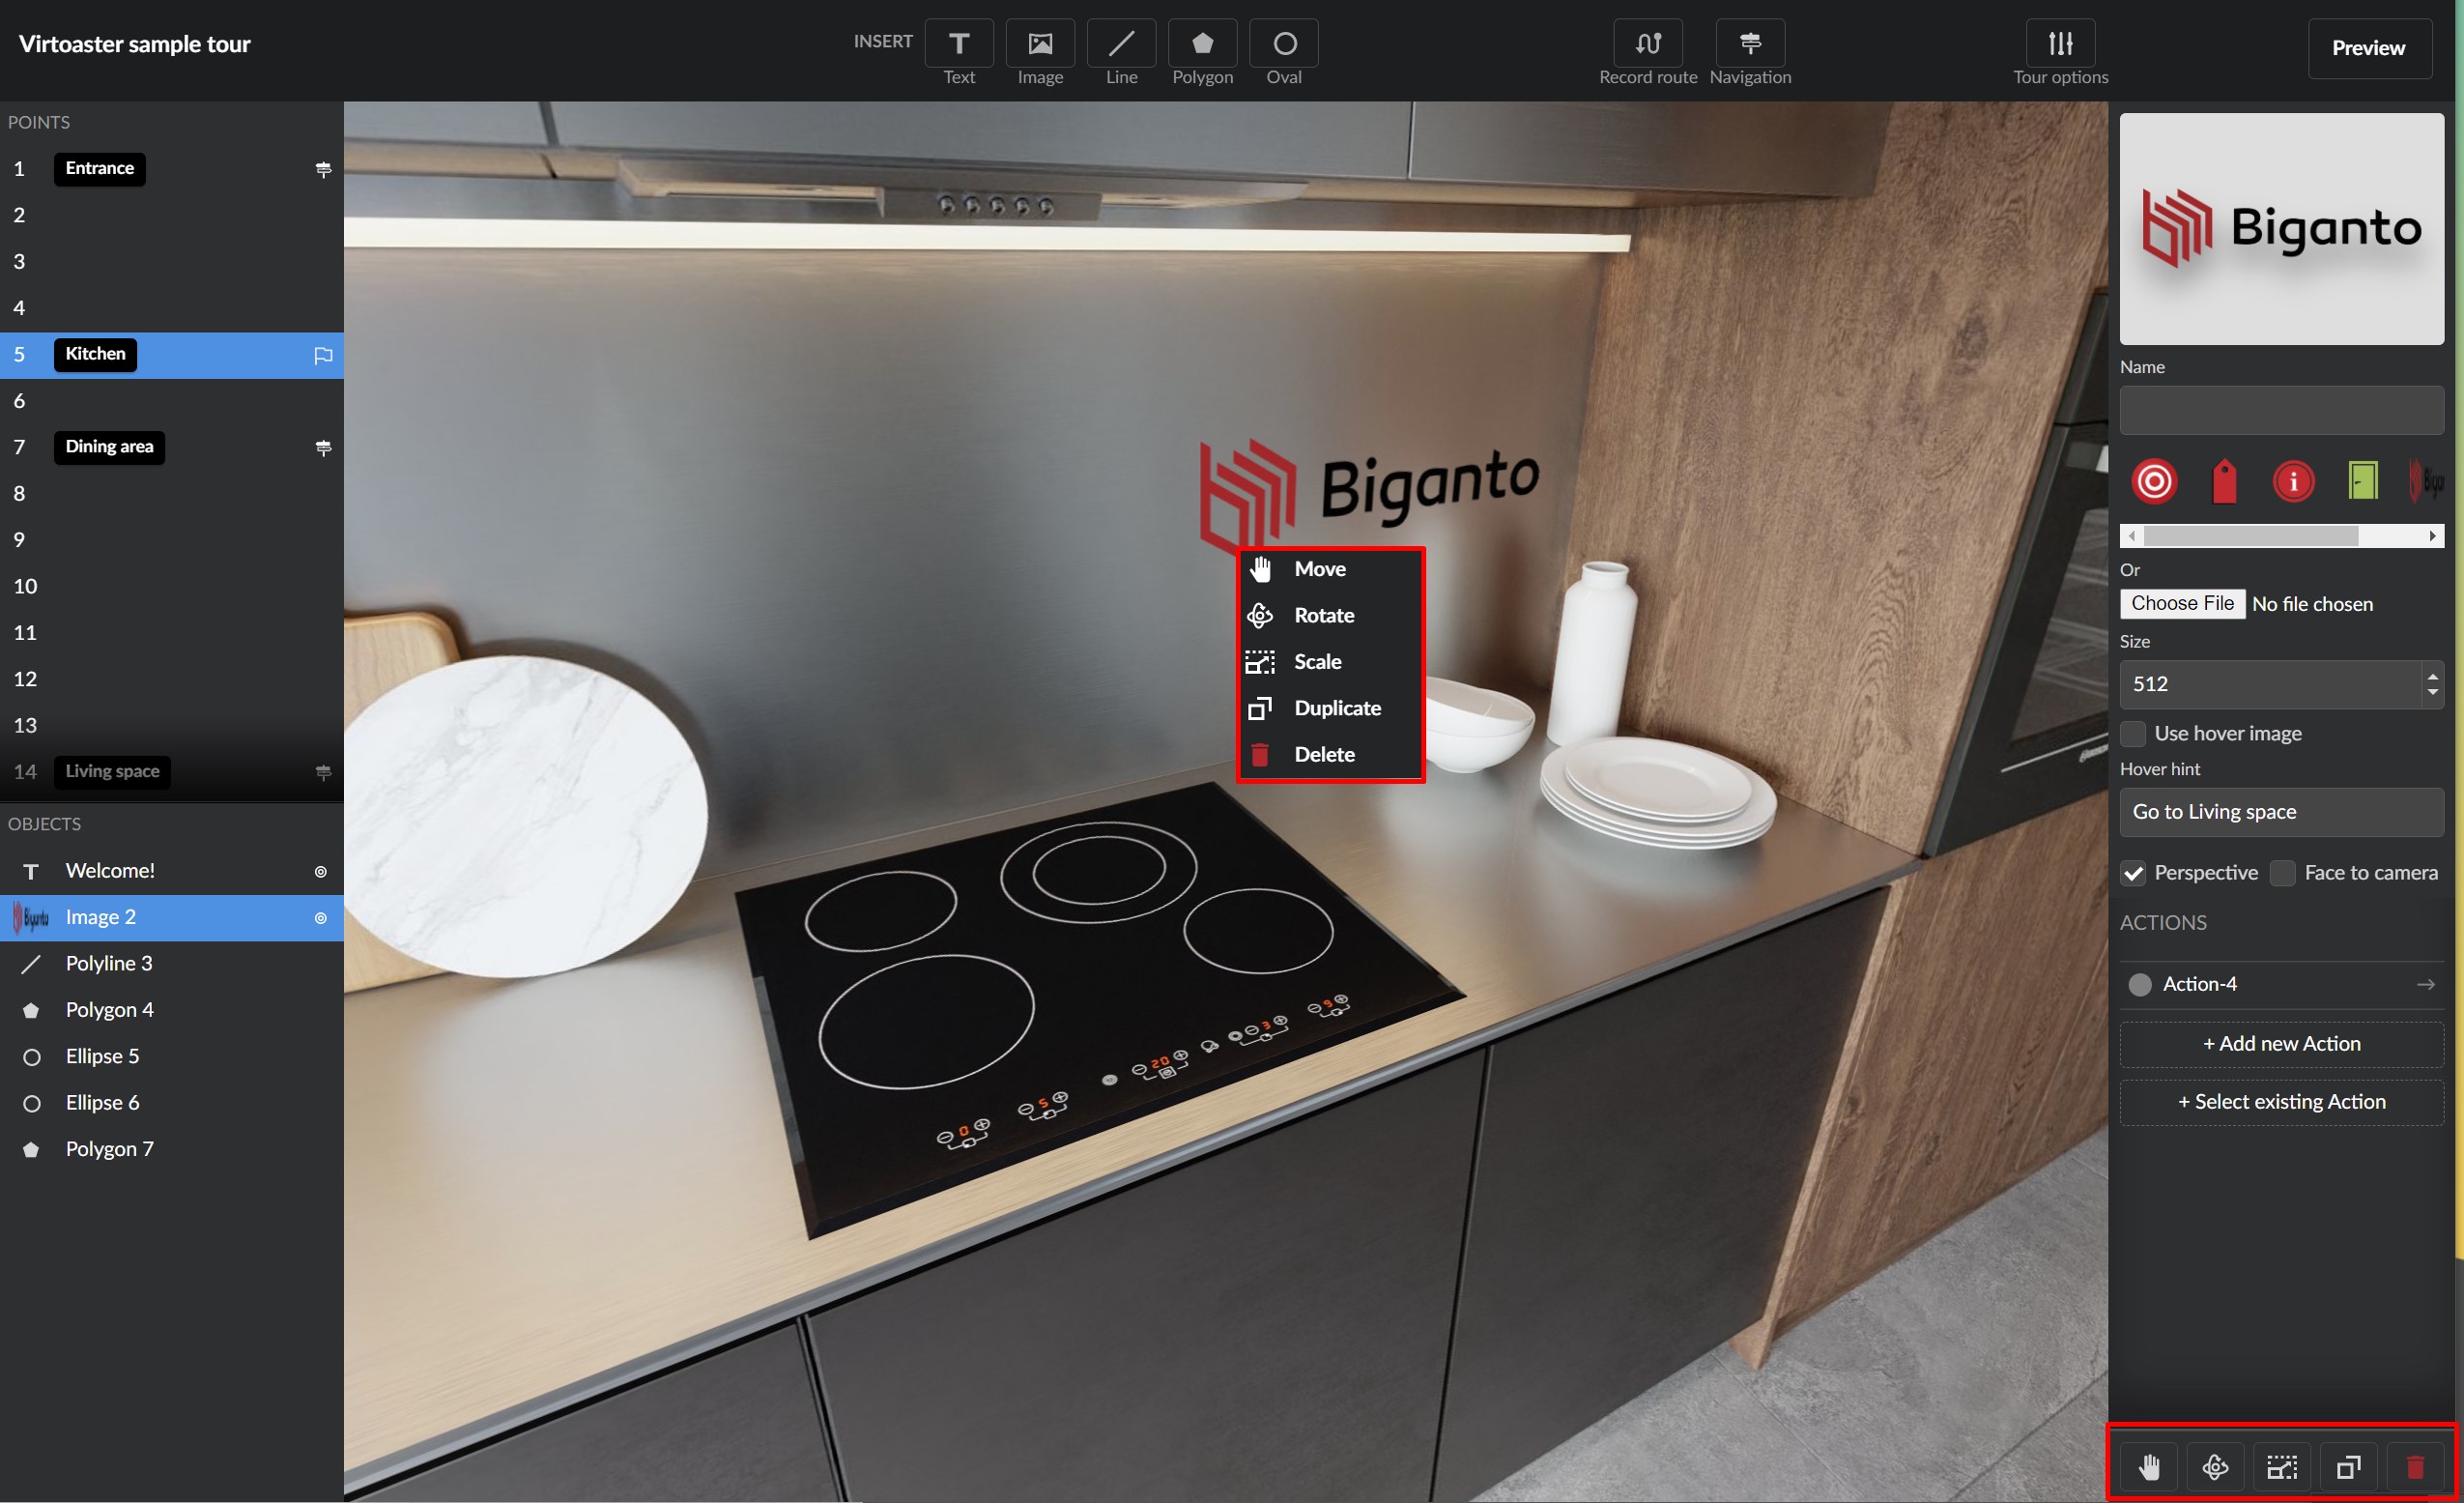
From this menu you can move, scale and rotate the object with different transform helpers the same way you operate 3d meshes in any 3d software package. Press Save when you are satisfied with the result or press cancel to discard changes. You can also delete or copy an object from this menu.
Now, let’s talk about Actions. You can add a new action or select existing in the overlay menu on the right side of the screen (overlay should be selected).
Each type of action has its own set of settings, most of them are quite straightforward. Here is a quick description:
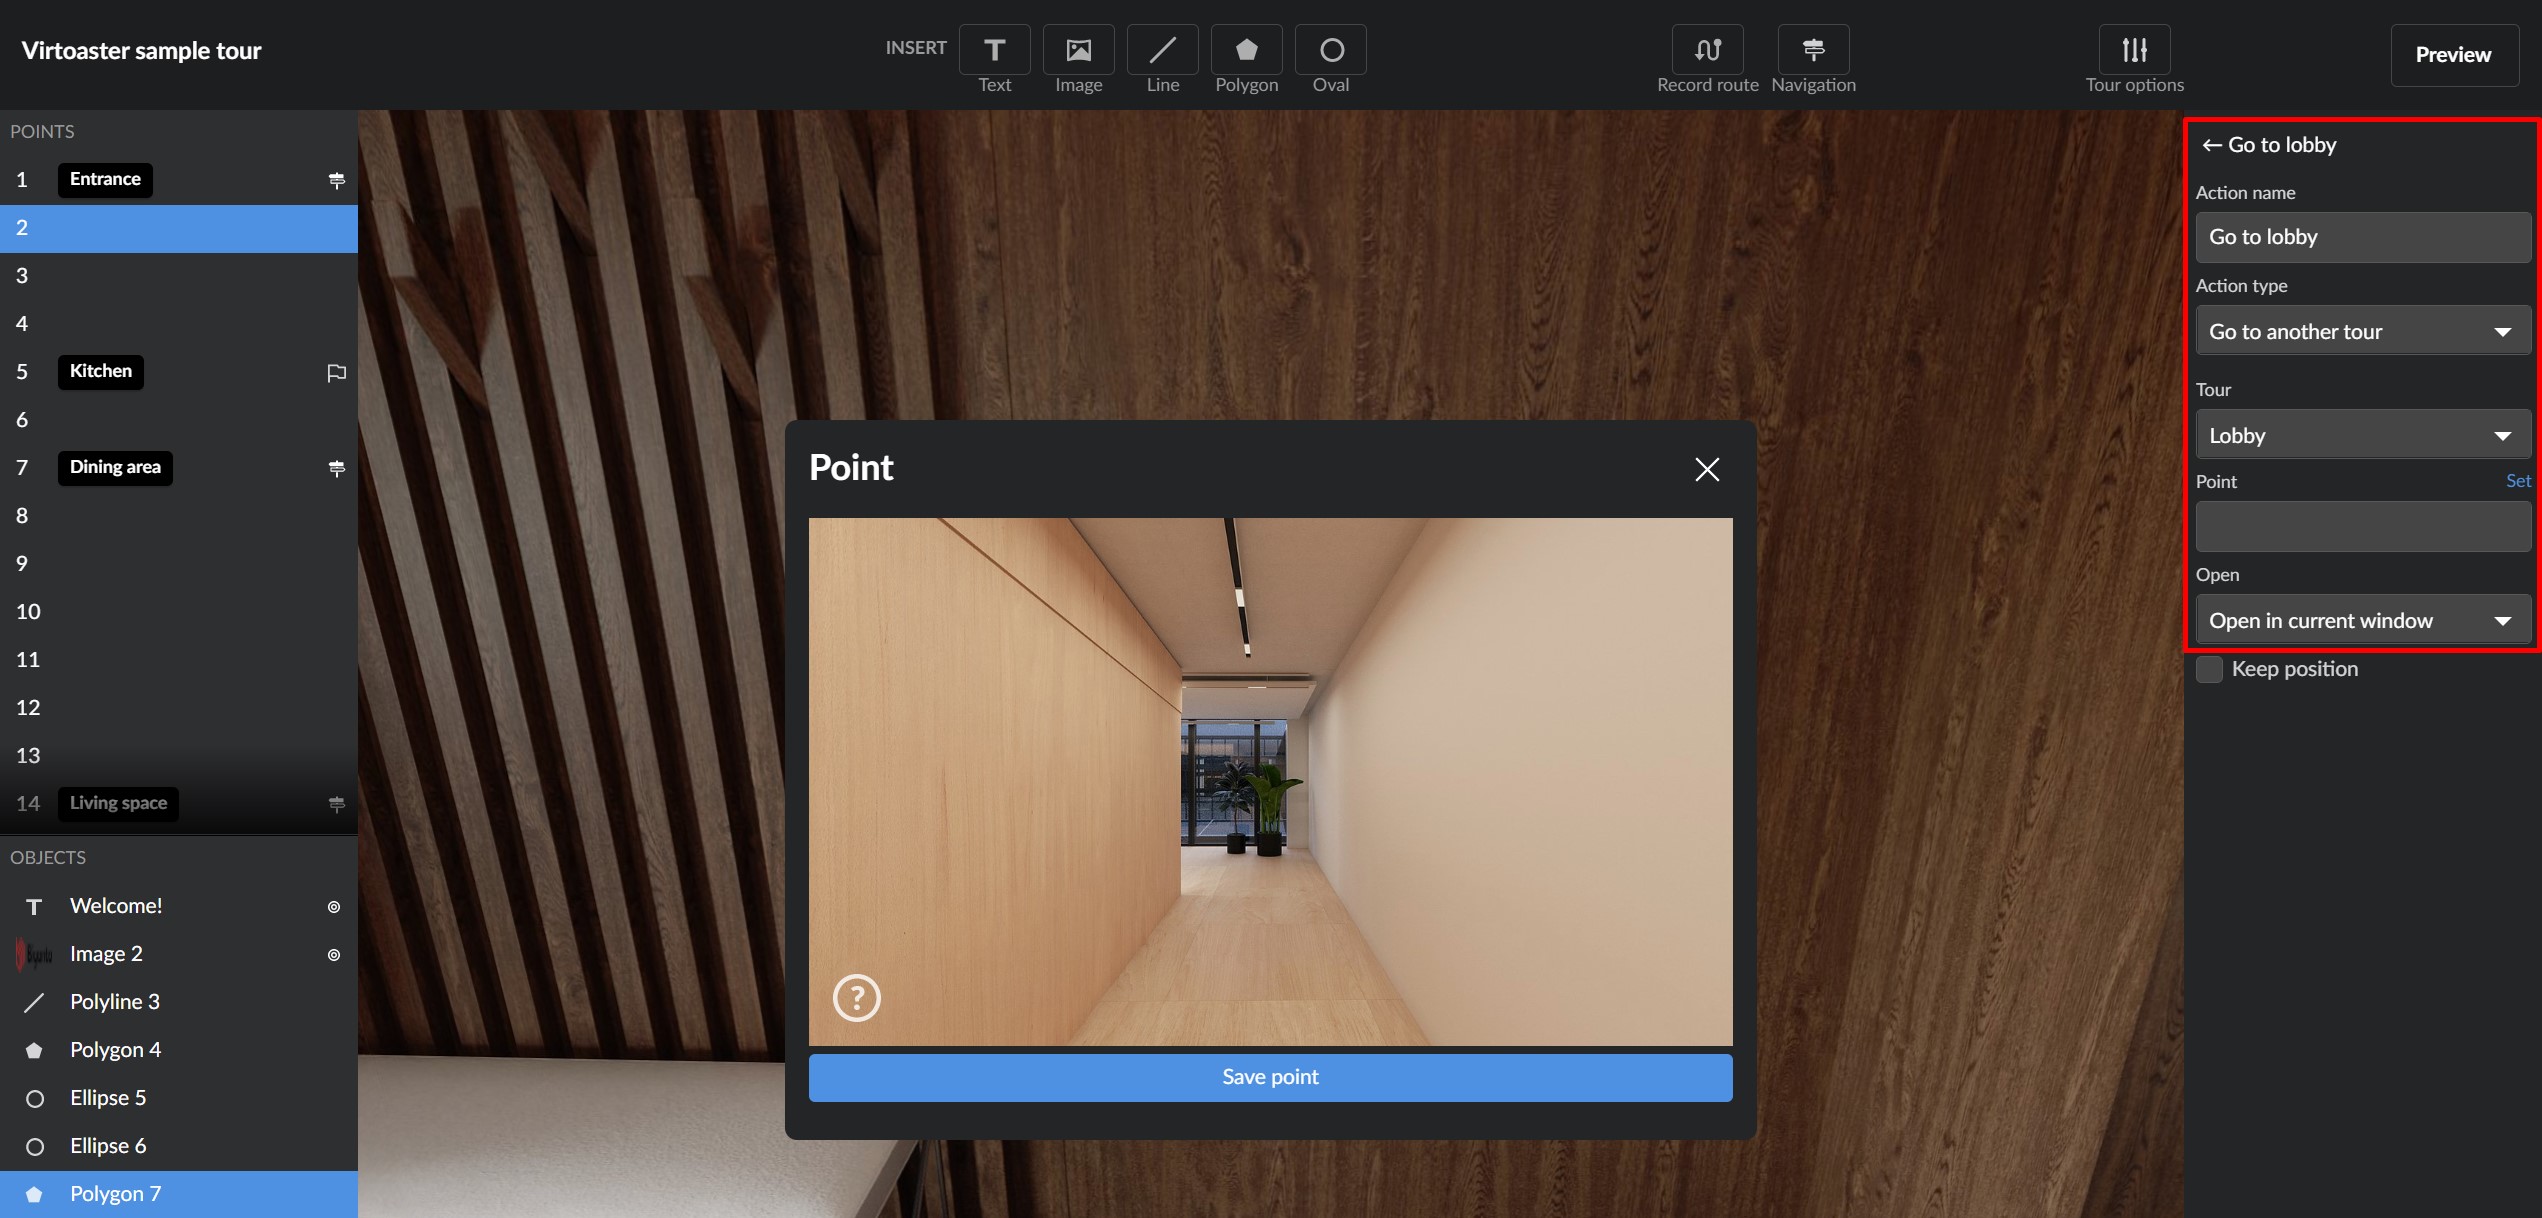
Go to another tour
Allows travelling to another tour located in your account. Select a tour from the list, select starting point and where in browser to open a new tour (current window/new window).
If you want to move to a different version of the same tour (e.g. initial tour is a whitebox and destination tour also has furniture), you can set the flag “keep camera position” to move to the same location in the new tour.
-
Go to point
Allows travelling to a specific point in the current tour. Press “Set”, travel to the required location in a tour and press save. When action will be triggered, the viewer will move to the specified point.
-
Open popup
Opens a new popup window, which may contain any kind of information - new tours, embedded web pages, text, etc. Select popup type, visual options, header and add embedded content. Commonly used to add media content from other websites, without directly uploading the content to the tour.
-
Open link
Opens any http link, specified in action settings. Paste the link, select where in browser to open it (current window/new window/parent window)
-
Play video/Play audio
Use this action to upload video or audio content directly to the tour. Upload the file and select the popup window size for the video.
To save an action, go back to the overlay menu (Esc or press the “back” arrow) and press Save. To delete an existing action, open action settings and press Delete.
Important: currently once action is saved, you cannot change the type of action.
Let’s go back to our example with the door and complete it, by adding an action. In our example we wanted to travel to a different tour by pressing an interactive object. This is what action settings will look like:
Other suggestions
Above is just one example of what you can do using an overlay + action system. Here are few more things you can try:
- Add image overlays to create points of interest in the tour.
- Add a furniture or material descriptions using text overlay + action to move to the manufacturer website.
- Add “Play” button with an image overlay to a TV screen + action to play a video.
- Add “open pop-up” action using HTML code as content to create custom pop up window designs.
- Add sound description of your property.
- Add bigger image on hover in Image overlay to create animation-like effect.
- etc.
This is just a suggestion of what you can do with an overlay system. Use these tools creatively to get the most out of your projects!