Preparing geometry for Virtoaster, Export tool
Summary
- Drag’n’drop Virtoaster export tool to your scene to run the script
- Open “Delete modifiers” block and press buttons one by one to delete corresponding modifiers in the scene
- Open “Remove extra geometry” block and press buttons one by one to remove unnecessary objects
- Open “Edit geometry” block. If you have compound objects united by groups (e.g. group of table surface and table legs) select these groups one by one and press “Collapse selected group” to receive single mesh
- Select transparent objects (e.g. window glass) and press “Make transparent”
- Press “Convert proxy to mesh” to select all proxy objects and convert them to mesh
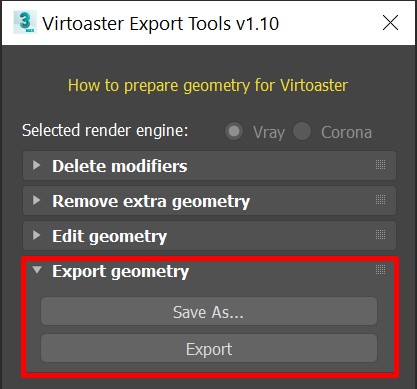
- Open “Export geometry” block, select where to save your scene with “Save as” button. Press “Export” to export your scene.
- Proceed with Rendering or Asset uploading
Full guide
The defining feature of Virtoaster is a use of lightweight 3d Model underneath 2d 360 panoramic images. Models we use in Virtoaster tours usually contain less than 200k polygons, so they can be easily processed by VR and mobile devices. While our optimization algorithm perform well in majority of the cases, it still somewhat depends on the quality of the initial geometry.
While, technically you can download your model as is, we strongly recommend to look through the instructions. By following them, you would proactively eliminate most of the potential problems with scene geometry and will reduce size of .obj file to upload. Most of actions can be done in several clicks with our tools for 3d Max. Below you will see a button by button description of “Virtoaster Export Tool”, which you can download here.
In order to use this tool you may simply follow script tooltips and pop-up messages while going through all the tools, step by step chronologically (meaning, you can press every button from start to end - it will be sufficient to prepare geometry).
Important: this set of tools will alter scene geometry, so your renders will change. Use Export tool in a separate scene or only after you’ve already completed all renders.
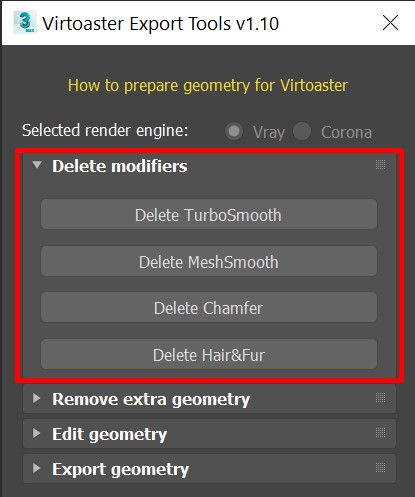
1. Delete modifiers
This set of tools will delete corresponding modifiers from objects (including some external plugins, such as “Quad Chamfer”), thus reducing polycount. It will not remove any modifiers located below “Editable poly” or “Editable mesh” in modifier stack.
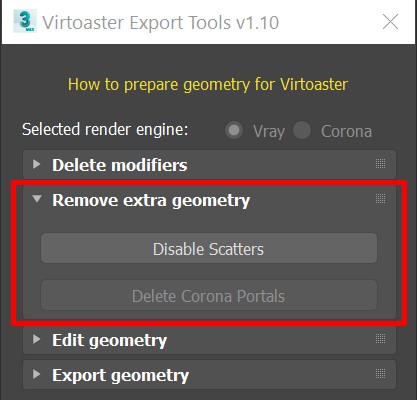
2. Remove extra geometry
This set of tools will remove unnecessary geometry from the scene, such as Corona portals (objects with CoronaPortalMtl) and will disable different scatters.
If you still want to see scattered objects in your scene, convert them to mesh before using “Disable Scatters” button. However, keep in mind that there are some technical limitations regarding large number of objects, e.g. there is no point in converting the lawn with millions of grass objects. In this case either grass will be removed during model optimization or scene will not be processed at all and will return with an error message while assembling the tour.
3. Edit geometry
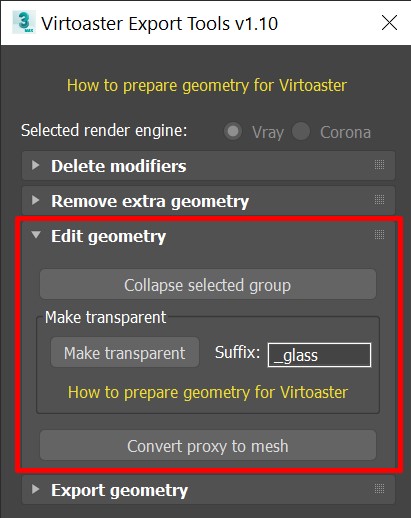
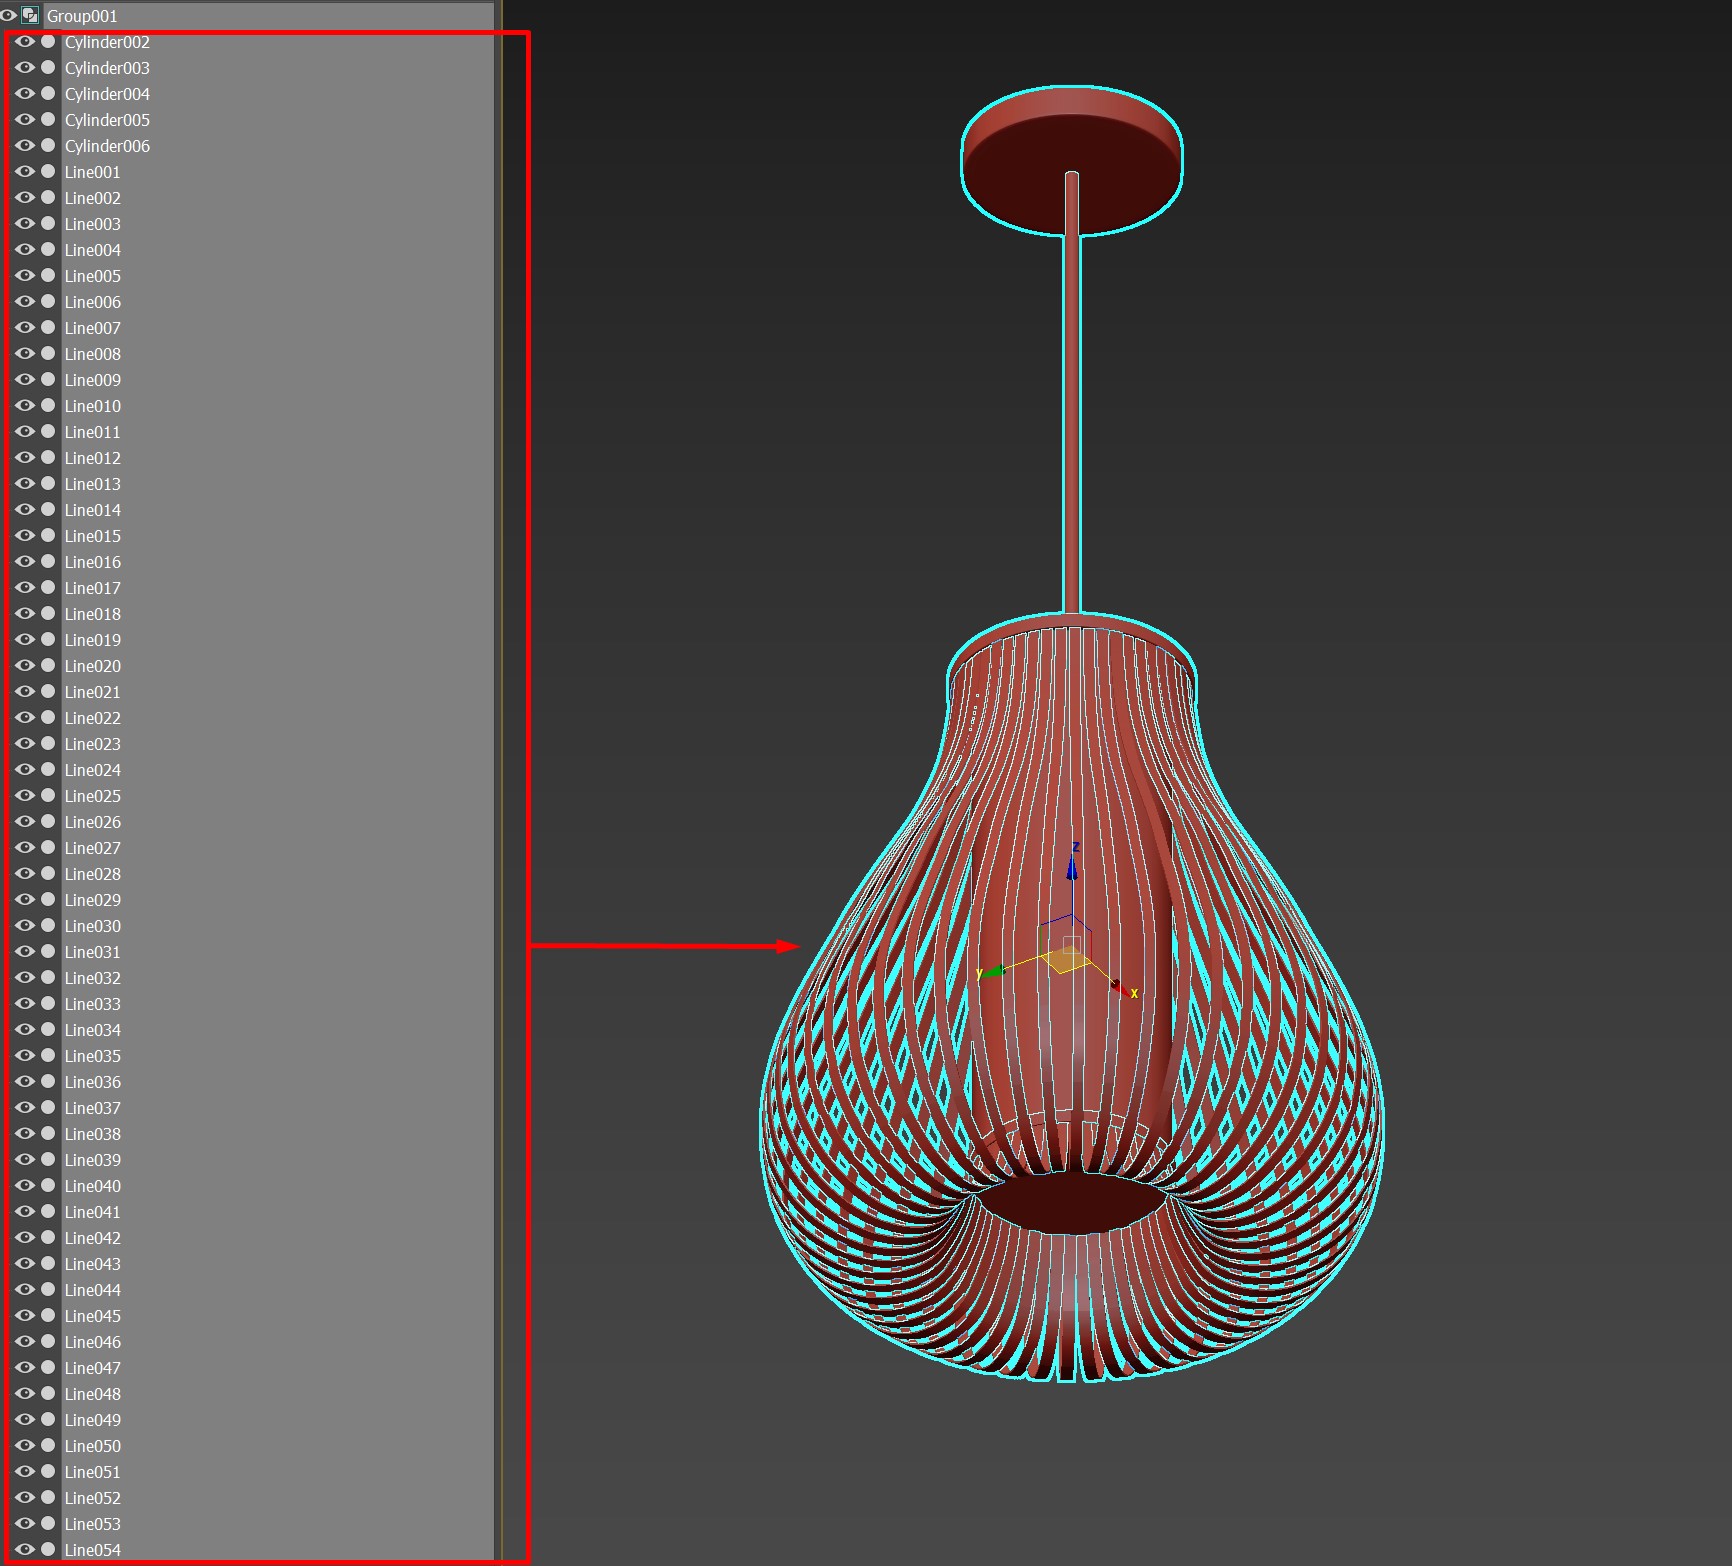
“Collapse selected group” button will attach all objects in a group into single mesh. Because our model optimization algorithm works on an object level, this will help to preserve as much geometry as possible. Here’s an example:
The chandelier consist of 60 separate objects and each one of them will be evaluated when optimizing model. These objects either will be removed if they are too small or they will be optimized individually. This will result in higher polycount and worse shape preservation, compared to optimizing chandelier as a solid mesh. You don’t need to collapse every group, but we recommend to process some groups in your scene, so every separate object is a separate mesh.
Important: objects smaller than 5 square mm or bigger than 200m in any dimension will be deleted from the model. Such objects are too small to impact 3d model or too big to be processed efficiently. There should be no more than 6000 objects in the scene.
Important: geometry optimization works on object level. If for any reasons there is a stray geometry, not belonging to any object in .obj file, than 3d model will not be correct.
“Make transparent” will add “_glass” suffix to selected objects name. This will disable render projection for these objects to simulate transparency. Only select objects you want to see through, without attached non-transparent elements (e.g. window glass, but not window frame).
“Convert proxy to mesh” will detect what kind of proxy you are using (VRay or Corona) and will transform proxies into meshes. By default proxy objects are being exported to .obj exactly as you will see them in viewport (e.g. you will receive a box when using bounding box display mode). Using this tool may result in a framerate drop in 3d Max viewport. If you have significant amount of complex objects, we suggest to transform them to mesh and optimize manually.
4. Export geometry
“Export geometry” section will help you to set export settings automatically. You don’t need to change anything or export manually, instead you only need to specify where to save .obj file. By default it is set to the location of your 3d Max file. Exporting complex scenes might take some time.
Important: there is a technical limitation of no more than 5000 objects in the scene. It your scene has higher object count, than you will receive an error message. Use “Collapse selected groups” tool in the script to reduce object count.
Once geometry is exported and your renders are complete, you may proceed with asset uploading.