Editing tour assets
In this guide you will learn how to change assets of your tour when making changes or fixing issues. Even though it is a pretty straightforward process, there are some details you might want to know before starting.
Replace model
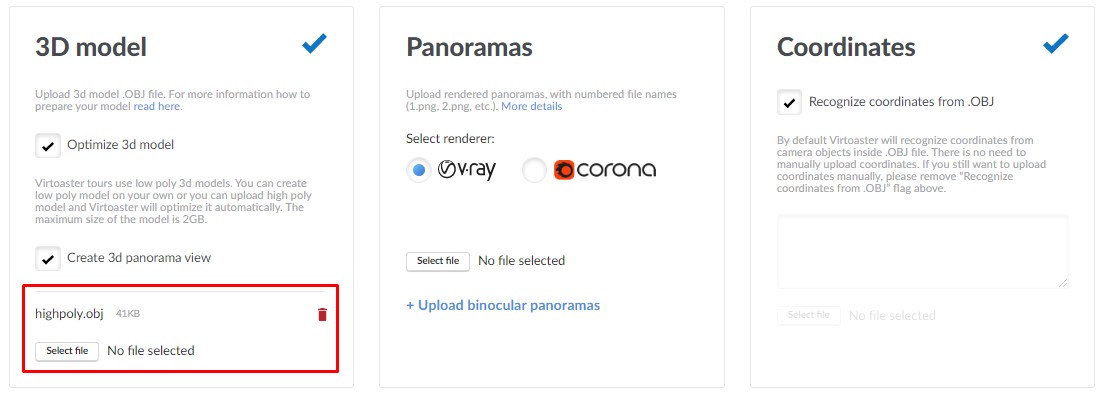
Model is an essential part of the tour and changing it is the most radical thing you can do. You only need to change the model if there are significant changes in the geometry of your tour.
Important: in most cases replacing the model will require tour reassembly. Processing the tour will take some time and will be subtracted from your toasts per month limit. However advanced users can manually replace model in case changes are insignificant. Please have a look at "Manual model replacement" guide.
To replace the model, enter the tour you want to edit and press “Edit assets”.
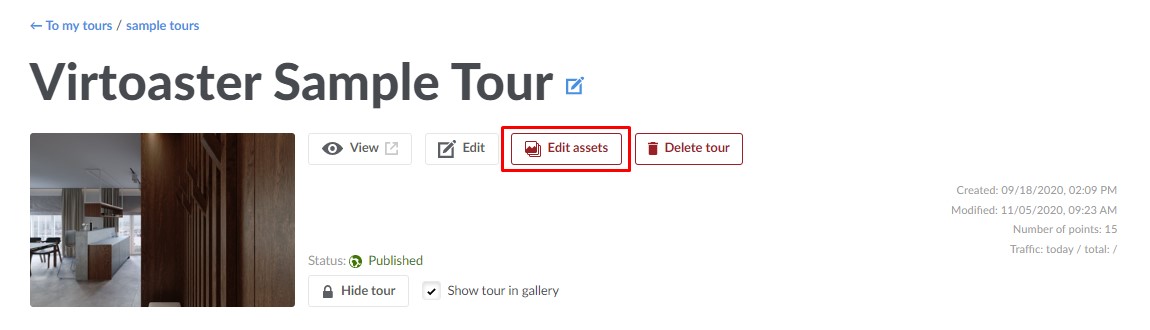
You will see the interface you used when creating the tour. Simply upload the new, correct model and press “Create tour” to continue.
Important: if your tour has “Published” status, its initial model and panoramas have been deleted already. If returned to asset uploading, initial assets will be lost permanently and the tour will have to be reassembled using new or old backup assets (panoramas and model). Reassembled tour will keep its ID and html address. Tours with “Testing” status still have their initial model and panoramas inside our system, so you do not need to upload images again.
Replace panorama
You can change panoramas freely at any time. Keep in mind that 3d panorama mode will not be updated, however. It is only being updated when changing the model as well.
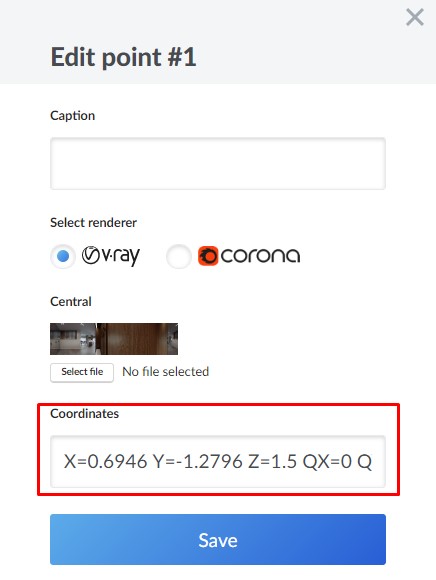
To replace individual image, hover over the panorama in the list and press “Edit”:

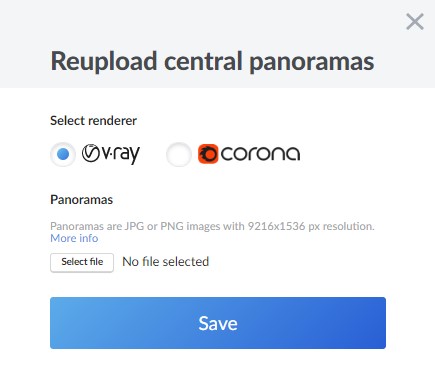
Here you can do several things, including new image uploading.

Select file path or drag and drop new image and select correct render engine. Press “Save”. When replacing the individual image you directly upload into the point you’ve selected, the image index in the file name is not relevant.
Replace all panoramas
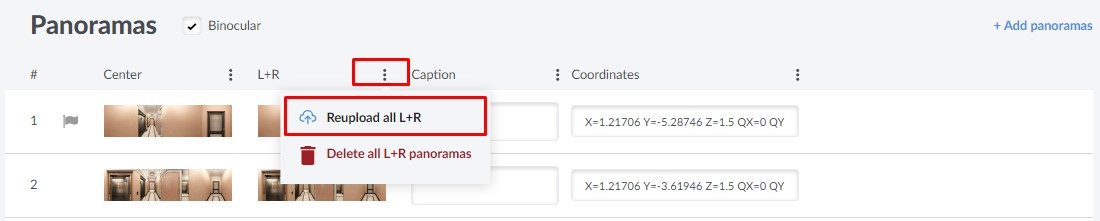
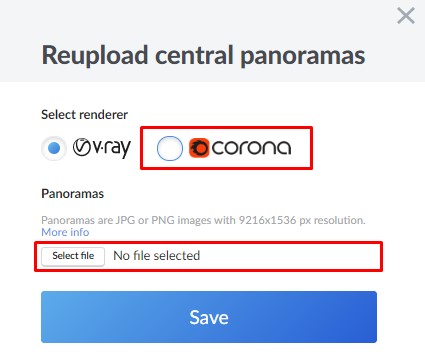
To replace all images at once, press the button next to “Central” title and select “Reupload all” above the panorama list.

As usual, do not forget to select the correct renderer and upload new images. Keep in mind that you should have the same image indices as you had before to match new images to correct points.
Replace binocular panoramas
To replace only binocular panoramas just follow the same process:
Change point coordinates
Sometimes rendering a new image is not enough and there are cases when you also would want to change the position of the point in a tour. To do so, you will require to change point coordinates.
Important: while you can change images without changing coordinates, the opposite will not be correct. If you want to change point location, you have to upload a new image as well. Older image will not be aligned properly with the 3d model anymore.
To get the coordinates of a specific point, use “Camera creation tool” (drag and drop into 3d max viewport) and extract a .txt file with the coordinates. You can learn more about this process in the camera creation guide.
Simply copy the line with the coordinates from .txt and either paste it in the text box in the panorama list or while uploading a new image:

You can also edit all points at once by pressing the button next to “Central” title and selecting “Replace all” above the panorama list.


Add additional points
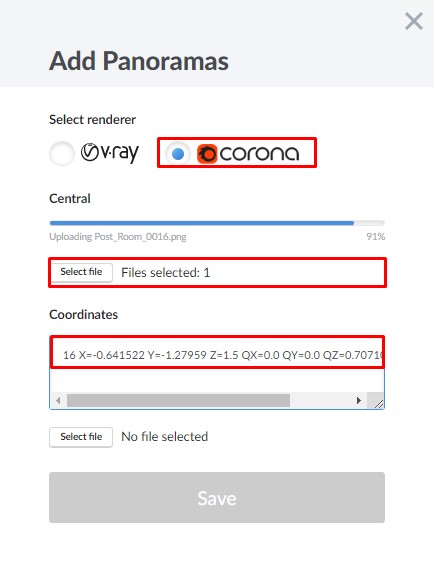
To add a new point you will require a new render for that point and its coordinates. To add points press “Add panoramas” above image list:

Select render engine, path to new image and paste coordinates into the text box. Save changes.
Change renderer
Selecting the correct render engine impacts the alignment of images to the model. If the render engine is not correct, most likely you will not be able to walk properly inside the tour. Because our system processes uploaded images depending on the render engine, to change the renderer you must upload all images again.
To do so, press the button next to “Central” title and select “Reupload all” above the panorama list.

Upload images and set the correct renderer (VRay is used by default).
Important: if you created the tour using incorrect render, the textures in 3d panorama mode will be broken. Changing the render engine will not be sufficient to fix them, the whole tour needs to be created again (see Replacing model).