Preparing geometry for Virtoaster from Unreal Engine, Export tool
First Launch
Before launching, make sure the required plugins are enabled:


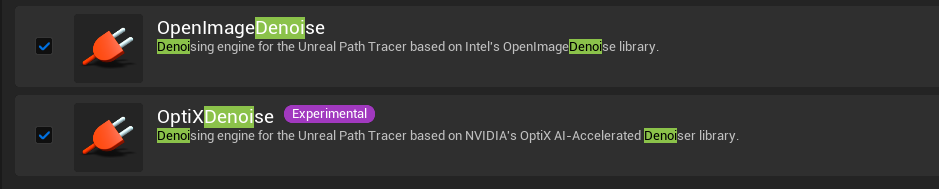
If you plan to use a denoiser, it is also recommended to enable (optional):
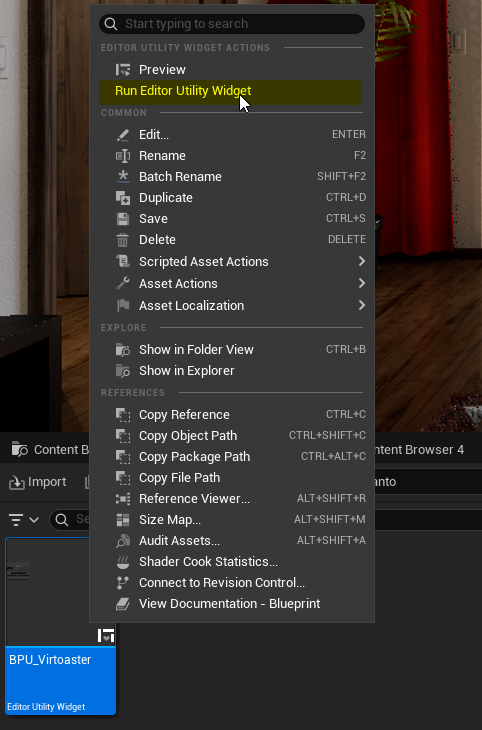
The file BPU_Virtoaster.uasset can be placed anywhere in your project's Content folder using File Explorer. After this, the utility will appear in your project.
To launch, right-click the utility and select Run Editor Utility Widget.
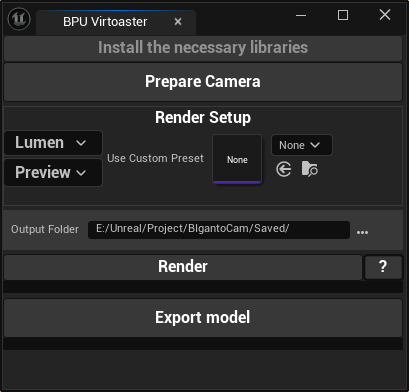
On the first launch, you must install all required libraries. Click Install the necessary libraries.
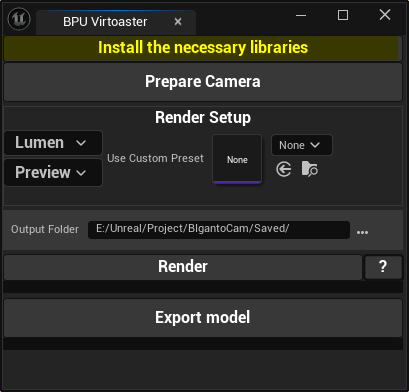
If the libraries are not installed, a warning will appear when you try to render.
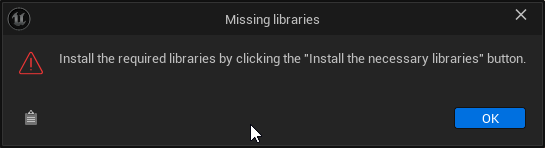
Once successfully installed, the button will become inactive — indicating readiness.
Scene setup
To define panorama camera positions, use the Actor type Target Point.
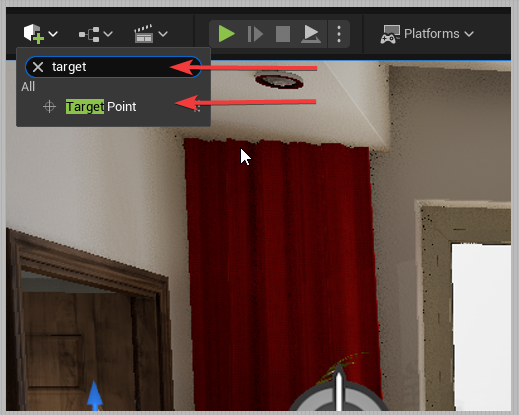
Place the points 1.5 to 3 meters apart and about 1.5 meters above the floor.
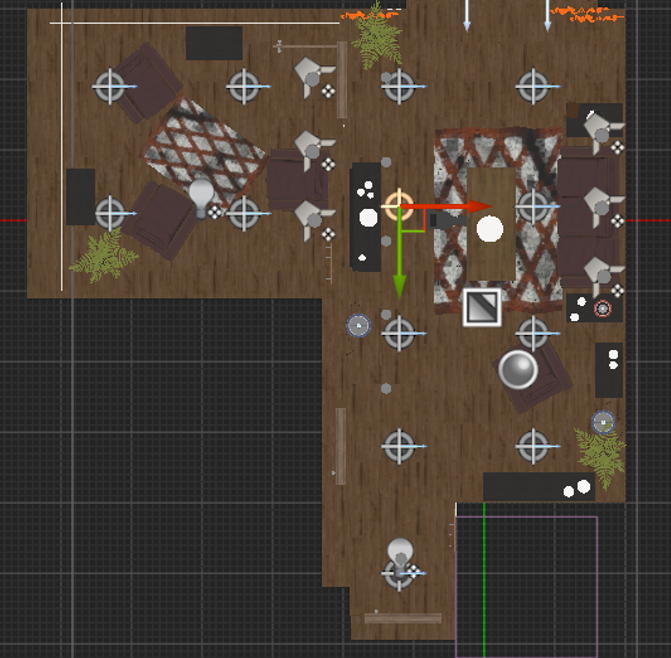
After placement, press Prepare Camera.

A VirtoasterCamera will appear in the scene and a Sequencer will be automatically created — the path to it will be shown in a popup message.
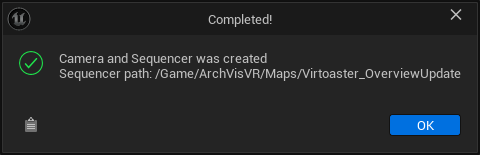
The Sequencer will open immediately afterward.

Post process
When you press Render, the Exposure Metering Mode is automatically set to Manual. To avoid unexpected lighting changes, it is recommended to switch it to Manual manually and adjust brightness in advance.
-
Exposure Compensation should be kept near 0

-
Use the ISO setting in the camera to increase brightness

- Motion Blur, Bloom, Chromatic Aberration, etc., will be overridden automatically using console commands
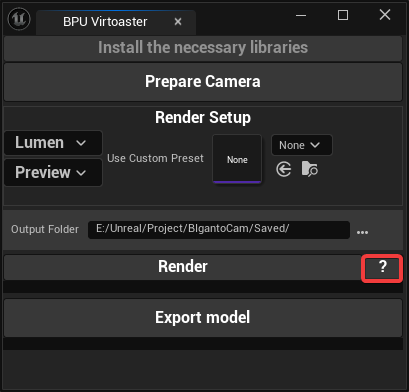
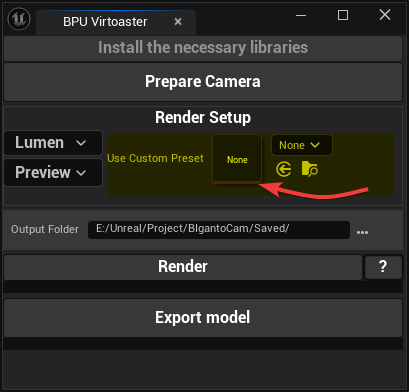
Render setup
There are 5 render presets available:
- Lumen Preview
- Lumen Final
- PathTracing Preview
- PathTracing Final
- Custom Preset
Click the “?” button to see active settings for the selected preset.
Presets Lumen:
- Preview: tile size — 2000x2000
- Final: tile size — 4000x4000
Presets PathTracing:
- Preview: tile — 2000x2000, SPP64, Spatial32, Temporal4
- Final: tile — 4000x4000, SPP128, Spatial64, Temporal4
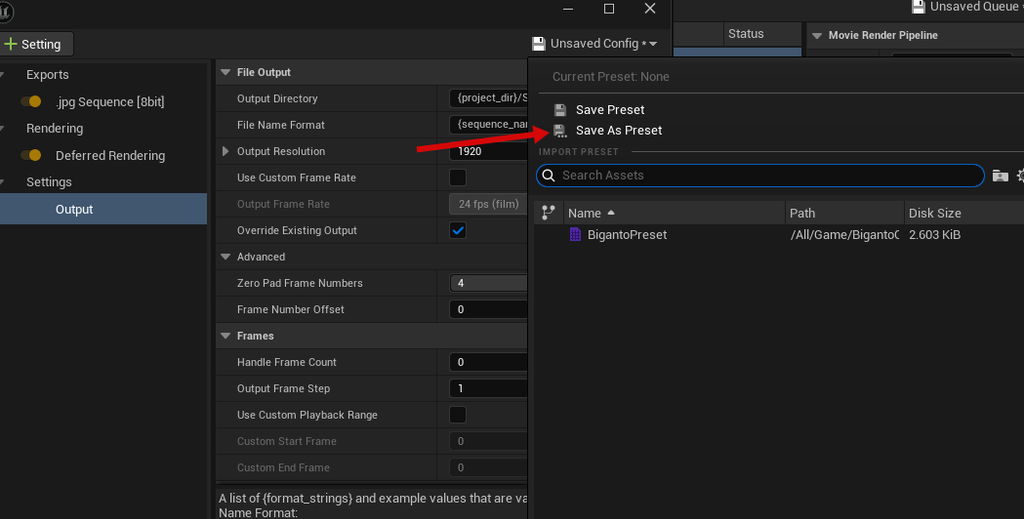
Custom Preset
If the built-in presets donʼt fit your needs, you can use a custom one.
To achieve a correct final result:
-
Output Resolution aspect ratio must be 1:1

-
HighResolution must be enabled
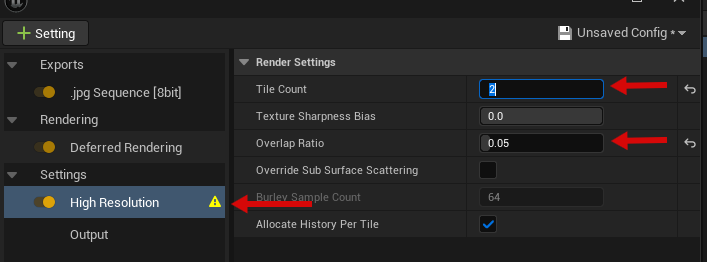
This disables unwanted effects like certain ScreenSpace effects, Bloom, etc.
Set the following:
- Tile Count = 2
- Overlap Ratio = 0.05
Place the saved preset into the preset slot. All settings except the Output Folder will be overwritten.
Rendering
Once everything is set up, click Render.
The render process will begin using the active Sequencer — make sure it is open.
After rendering is done, panorama stitching will start (shown via progress bar).
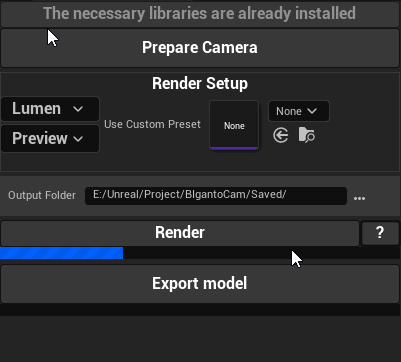
A popup will indicate when stitching is complete.

Final panoramas will be saved in the Output Folder, with a resolution of 9216x1536, regardless of the tile size. Higher tile resolution improves final quality after compression and stitching.
Export Model
Click Export model to begin exporting the scene to .obj format. This may take some time depending on the size of your scene
All Static Mesh Actors and Blueprints that contain a Static Mesh Component will be included in the export. After the export is finished, a confirmation popup will appear.
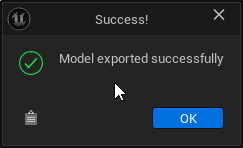
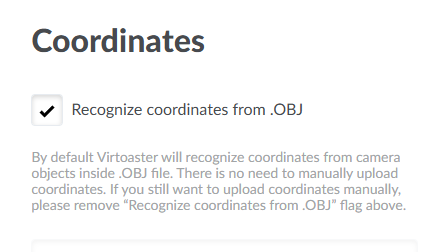
The .obj file will be saved to the path specified in Output Folder. Camera and object coordinates will be automatically exported from the .OBJ file.